
Do It Yourself, or DIY, wedding projects allow you to create your own personalized favors and touches that can be applied in any way you can imagine on your special day, for a shower, a party or whenever. All you need are some basic items and a little creativity.
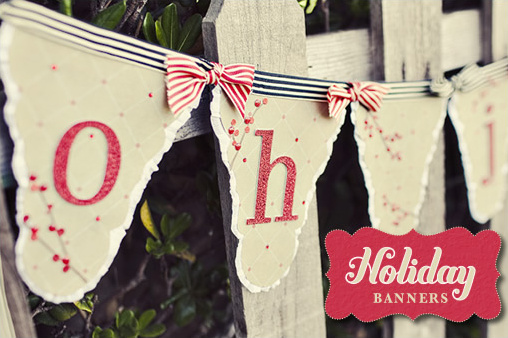
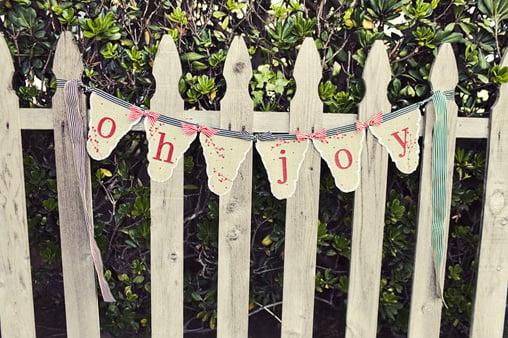
These adorable Do It Yourself Holiday Banners can be used for any occasion. The two that we designed for this post are holiday themed, but they can be made as birthday banners, any holiday banners or even as an adorable addition to a wedding (behind a dessert bar, etc.). We had so much fun creating these banners for Wedding Chicks. See more clever do-it-yourself wedding projects here.
Enjoy!
Step 1:
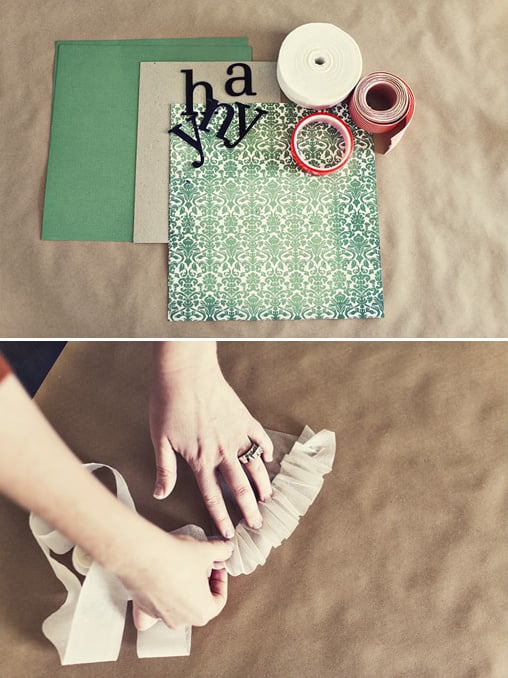
Choose the papers you would like for the banner (we recommend a pattern for the front, and solid for the back). Here, we used the patterned green for the front of the banner, and the plain green for the back. You will need several pieces of chipboard for the middle layer of each piece of the banner. Scissors and/or a paper cutter, chipboard letters (these glittery ones are our favorite – by “making memories”), and *very* strong adhesive (we recommend “red tape” – shown here), a cute, thick ribbon (we used this red stripe – 5 yards, size 2 inch) and a roll of crepe paper are also necessary.
Step 2:
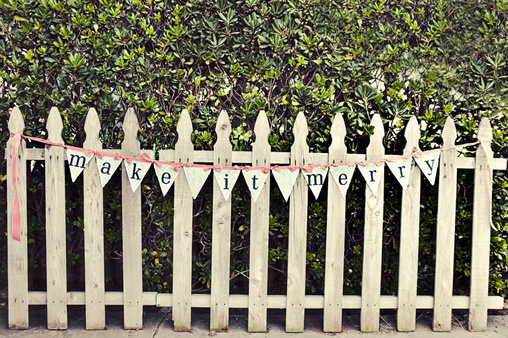
This is a close up of the supplies (especially the “red tape”, ribbon + crepe paper). This next step (which is easily explained as opposed to shown) requires the cutting of many triangles to create the banner. You will need to make a template (out of one of the pieces of chipboard) – whatever sized triangle you would like (depending on how large you would like the banner to be, and how large your letters are). Once you have made your template, you will need to use it to trace 2 sets of triangles (one patterned cardstock, one plain cardstock) for each letter – as well as one chipboard triangle for the middle. You will need to make a triple stack of the triangles (patterned stock, chipboard, plain stock) for each letter in the banner (with a “plain” triangle in between words). For example: our “Make it Merry” banner had 13 total triangles (one for each letter in MAKE = 4; one “blank” one; one for each letter in IT = 2; one “blank” one; one for each letter in MERRY = 5, for a total of 13 {triple stacked} triangles). Adhere the *plain* stock to one side of the chipboard. Wait to adhere the patterned stock until after the next step.
Step 3:
Using the red tape, make lines down the 2 long edges of the triangle (the plain chipboard side), as close to the edge of the triangle as possible. Take the roll of crepe paper, and “ruffle” it as you stick it down on to the red tape. *Be aware – the red tape is VERY sticky! Once the crepe paper is on the red tape, it is on for good!* There isn’t a “rule” to the ruffling; use your fingers to crumple and ruffle it…make it even or uneven, wide or skinny ruffles…any way you like it.
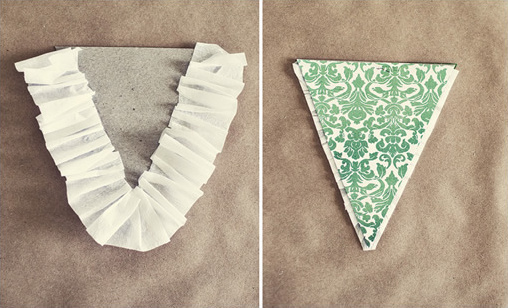
Step 4:
Once the ruffles are finished, adhere the patterned cardstock on top of the ruffled crepe paper, lining it up with the chipboard. You may need to press firmly to “smash” the crepe paper down a bit (in the middle). Take scissors and cut the crepe paper to be the desired length for sticking out of the middle of the banner “triangles”. We trimmed it so that only a hint of the crepe paper is peeking out. *You can add color or give a more vintage feel to the banner by “inking” the crepe paper (if you wish)*.
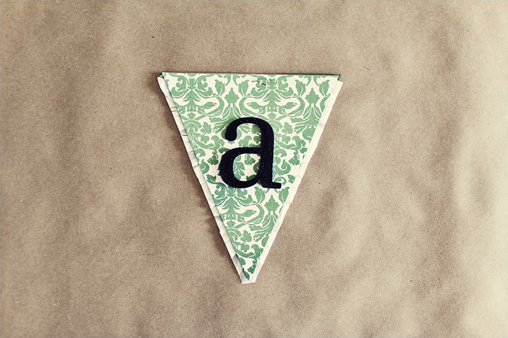
Step 5:
Adhere one letter to each triangle to spell out desired text for the banner.
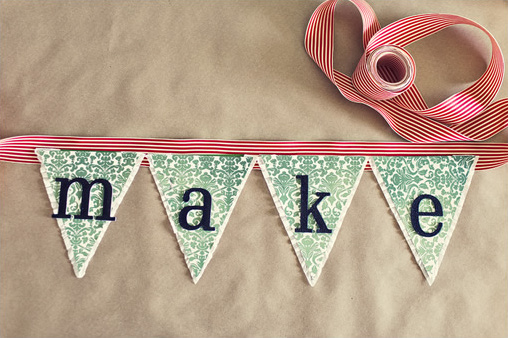
Step 6:
Unroll the ribbon (this is best done on the floor). Using the red tape, make a “line” of tape about half way down the ribbon, and across the length of the ribbon (as long as you need for the banner text). Leave space to make a knot on either end! Place each piece of the banner (right next to each other) along the red tape and press firmly.
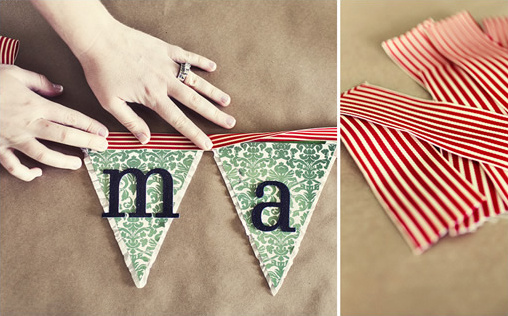
Step 7:
Pull the top half of the ribbon over the tops of each triangle, pressing down and securing the banner inside the ribbon. Cut small strips (approx. 3 inches) of ribbon (either the same ribbon as the main ribbon used for the banner, or choose another coordinating ribbon for this part) and tie knots (or bows) in between each triangle (and on either side of the entire banner – the ends). We used the same ribbon for the “Make it Merry” banner, and different ribbons for the “Oh Joy” banner. If you wish, add embellishments (crystals, etc.) – shown on the “Oh Joy” banner.
Thank you so much to Posh Paperie for sending us this awesome DIY and we want to throw a special shout out to the amazing Jackie Wonders for taking these lovely photos. If you want Posh Paperie to custom-make a banner for your event, contact them for more information.
Jackie Wonders Photographer tel: 619.787.4296
web: Jackiewonders.com blog: Jackiewondersblog.com email: [email protected]