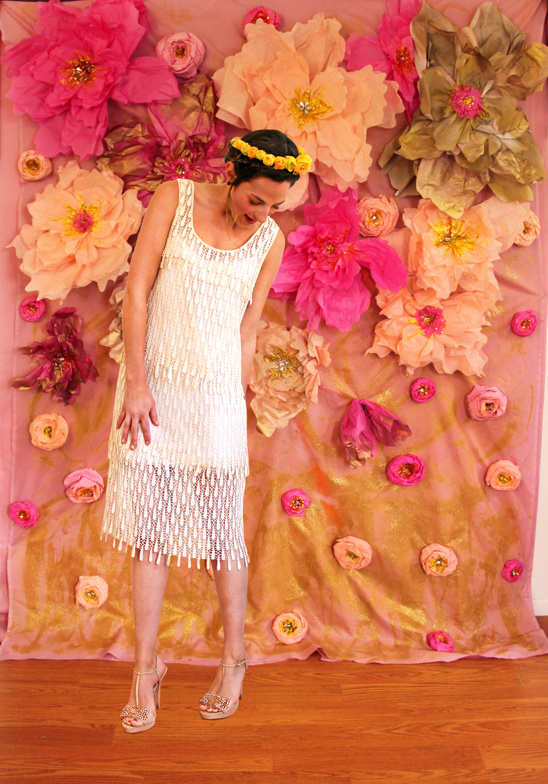
Paper Flower DIY Backdrop
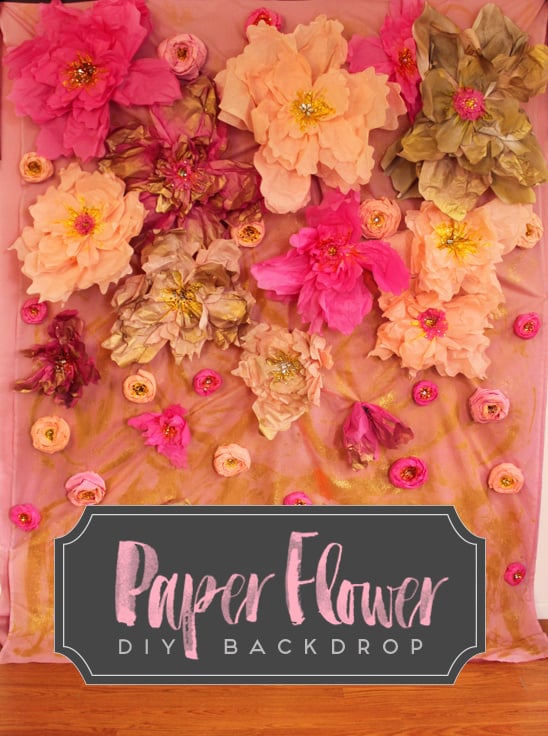
We absolutely love photo booths and all the crazy fun photos that come out of them! But if you are stressing about what to do for a backdrop, we are about to make your day!
Our friend Kerry Ann Stokes created this fabulous paper flower diy backdrop and gave us all the steps for putting it together! Want to learn how?! Just keep scrolling for awesome downloads and easy to follow directions.
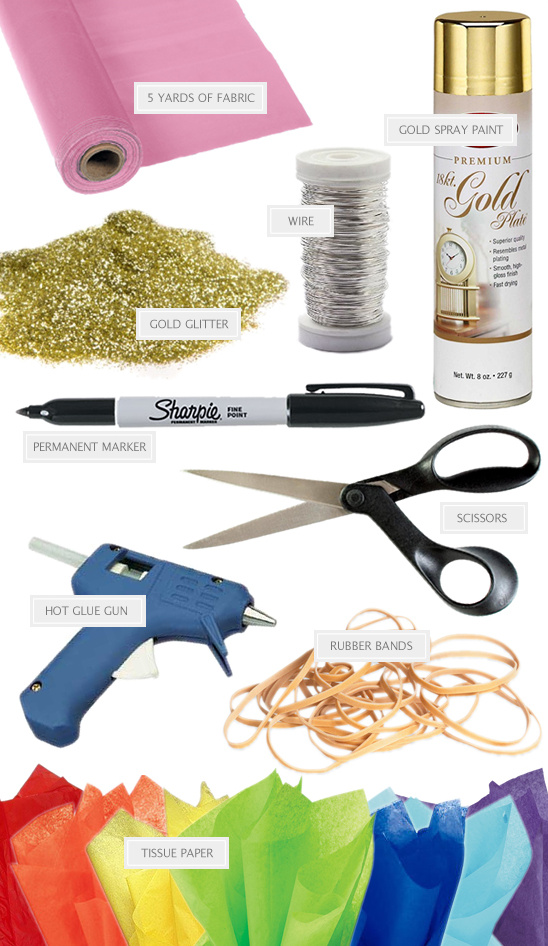
Materials:
Permanent Marker, Tissue Paper, Scissors, Glue Gun, Wire, Gold Spray Paint, Glitter, 5 Yards of Fabric & Rubber Bands
Tissue Petal Flower
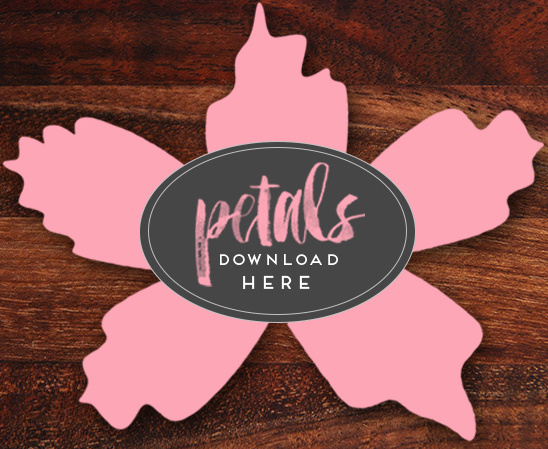
Step 1:
Sketch out petal shapes with marker. There is no exact shape that the petals should be. They should be organic, and each one should be unique. That said... if you don't trust yourself to draw petal shapes in the way you think would work best; click here to download petal shapes and scale them as you wish (the bigger the better.)
Step 2:
Layer four pieces of tissue paper together and cut out petals.

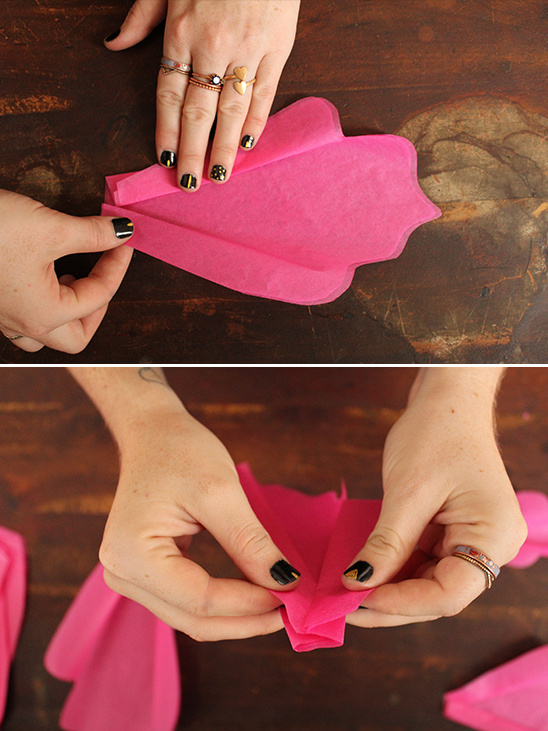
Step 3:
Next, fold edges of petals inward. Keep at least 2 pieces of tissue paper together, and fold the edges as image below. Add a dab of glue in crease to hold shape. This folded portion will add body to the flower.
Step 4:
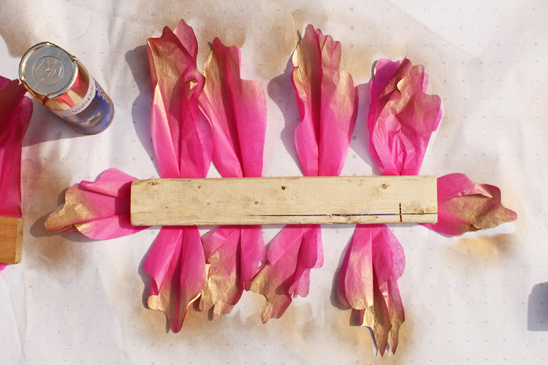
If you'd like to add a little metallic gold to the petal tips; now's your chance! Lightly spray the petals with spray paint, and allow to dry.
Step 5:
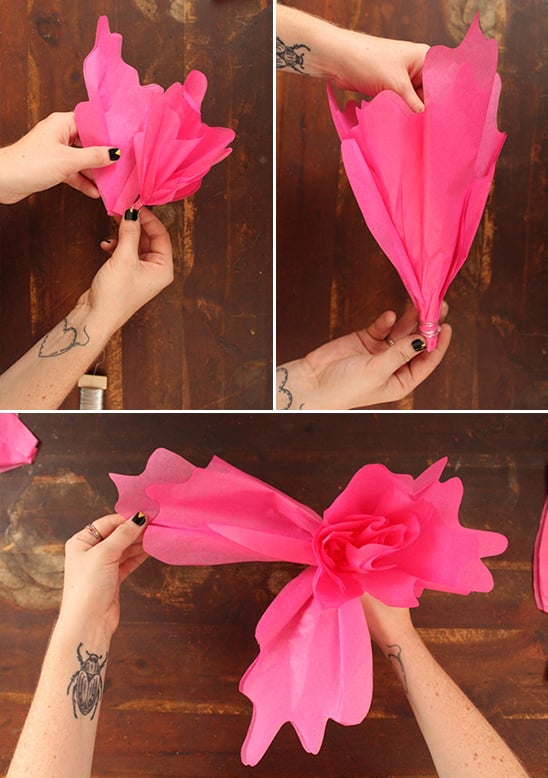
Combine petals, starting with the smallest and wrap bottom in wire. Continue to add the larger petals on the outside, about 3-4 petals at a time, and wrap in wire.
Step 6:
Start peeling back the outer layers of petals so that there is a flatter area in the center.
Step 7:
Once your flower is completely open—it's finally time to add the sparkle! Here, I started with my trusted gold glitter glue, and then applied sequins and beads. Put flowers aside and let them dry before attaching to fabric.

Tissue Paper Rose
Step 8:
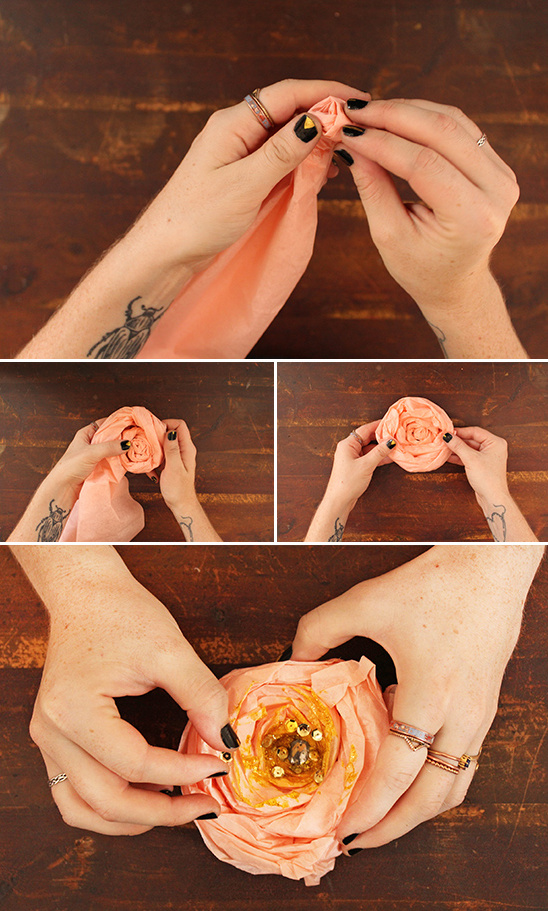
Start with a piece of tissue paper, and fold in quarters. Start from one end, and twist while rolling the strip of paper. Glue every 3-4 inches to hold in place.
Step 9:
Add glitter and sequins to the center of the rose.
Finishing Up
Step 10:
After taking a moment to snap a photo of you with your new giant flower eyes, it's time to get these attached to the fabric and hanging for all your friends to admire!
The roses can easily be glued (or safety pined if you prefer) to the fabric, but for the larger petal flowers—there is just one more step.
Step 11:
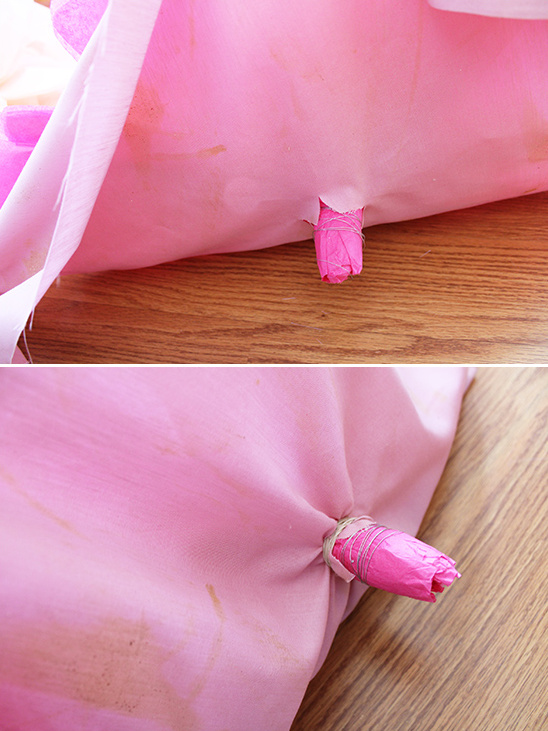
To attach large petal flowers to fabric, first mark location with an "x" and cut. Poke flower end (wrapped in wire) through the hole and secure with a rubber band (or wire.)
This allows for flowers to lay flat against the fabric, and will be covered by the second layer of fabric.
Hang up your fabulous paper flower backdrop and get ready to snap some sweet photos!
Photography & Design: Kerry Ann Stokes Floral Crowns: Kerry Ann Stokes Shop