Balloon Chandelier DIY
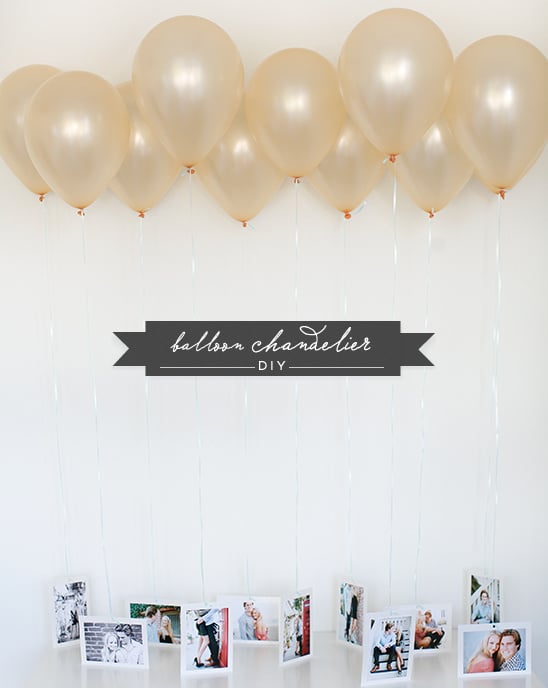
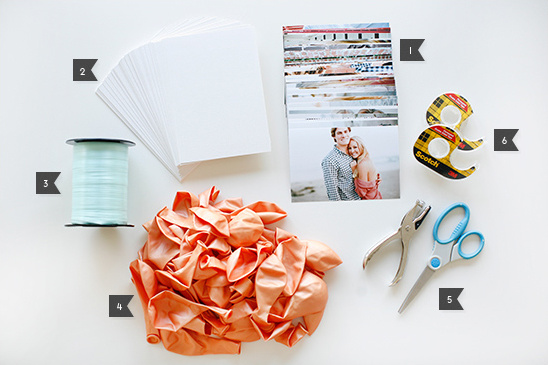
Do you remember our Glamorous Surprise Backyard Bridal Shower? Lucky for us, Brooke Keegan has shared with us how to create this entire event from start to finish. From the scrumptious nacho bar to creating the prettiest ribbon chair we have ever seen. Thankfully she is here again to show us how to create that incredible Balloon Chandelier that hung at Megan's shower. With a few supplies, you can easily create this meaningful masterpiece to showcase your engagement photos or any special pictures for that matter. Before you get crafting you are going to need the following supplies as well as a helium tank.
1. 4x6 photos
2. 5x7 card stock
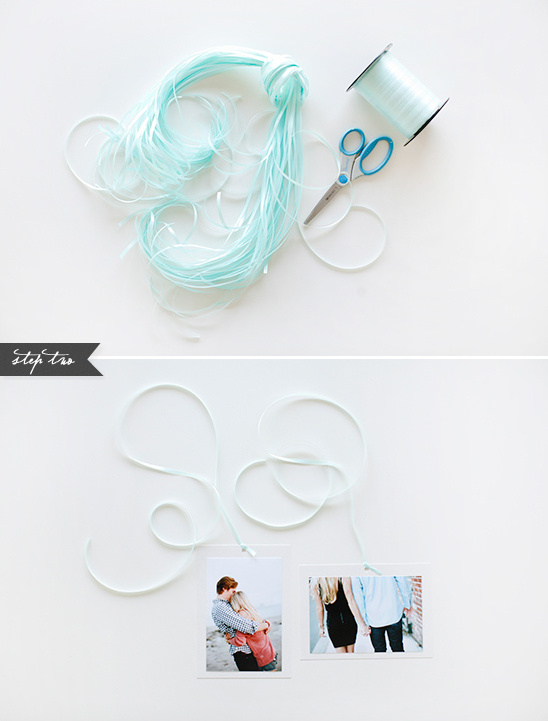
3. Curling ribbon
4. 12” balloons
5. Scissors & Hole punch
6. Double sided tape
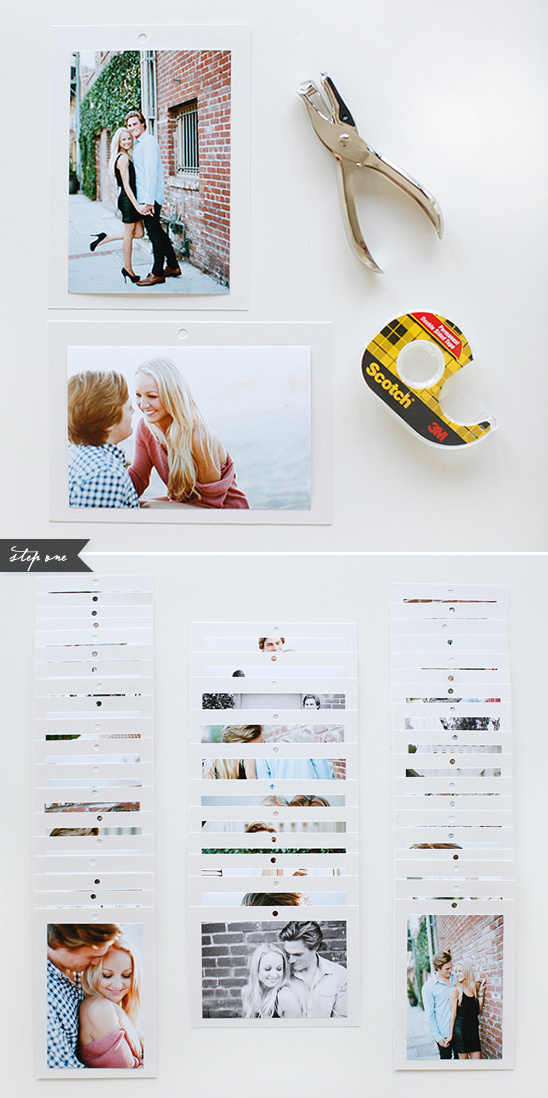
Step One:
Place 4x6 photo in the center of the 5x7 card stock with double sided tape. Then punch a hole in the center of the card stock.
Step Two:
Attach the curling ribbon to all of the photos.
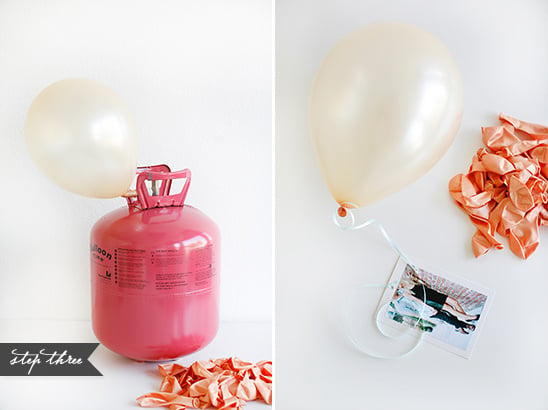
Step Three:
Blow up a balloon with the helium tank and tie it off into a knot to hold in the helium. Take one of the completed photos and attach the other end of the curling ribbon to the balloon. The easiest way to do this is to create a loose knot already, then slip it over the end of the balloon and pull tight.
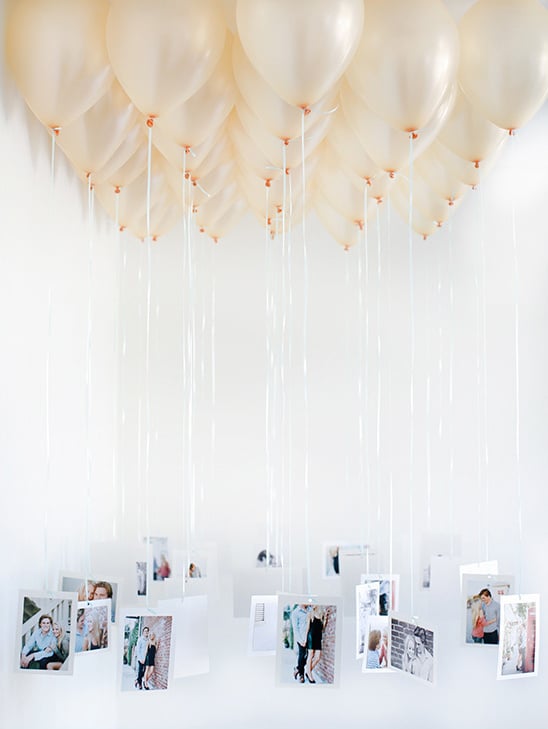
Once all the balloons are complete, you are ready to hang them from the ceiling. Add a 1” strip of double sided tape to the top of each balloon. You can then create any shape chandelier you desire by sticking the balloons to the ceiling. Do you love it?
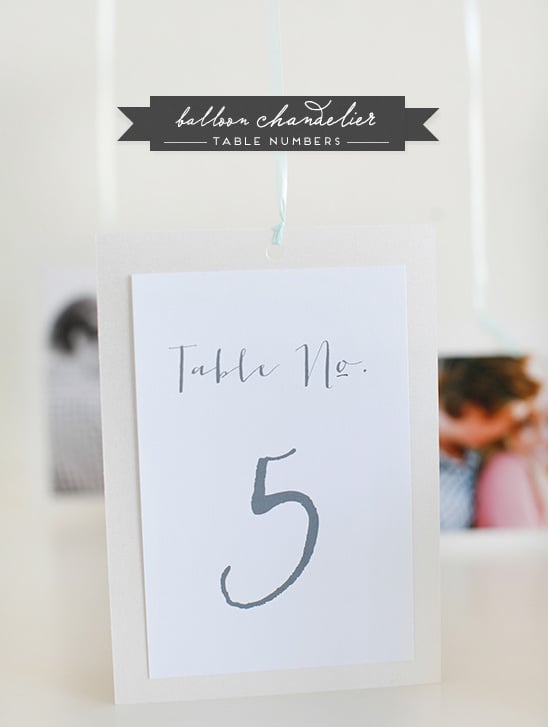
Another great idea is to use your balloon chandelier as your table numbers. You hang a balloon over each dining table with the front being a photo, and the back being a table number. Budget friendly, doable and so much fun.
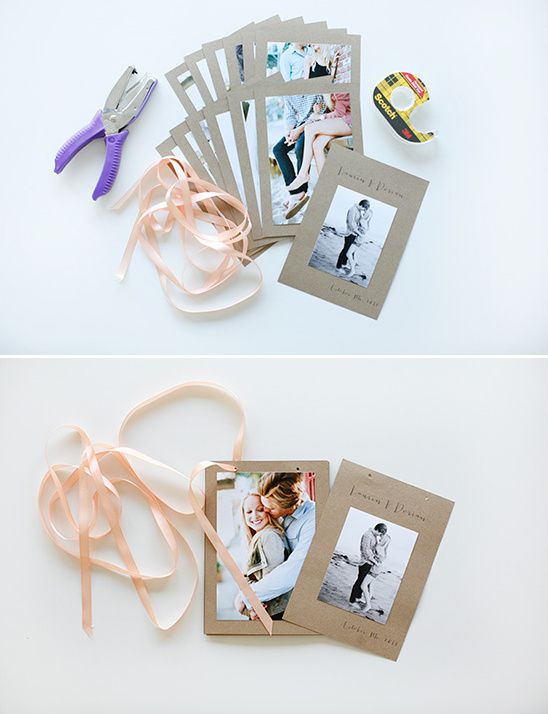
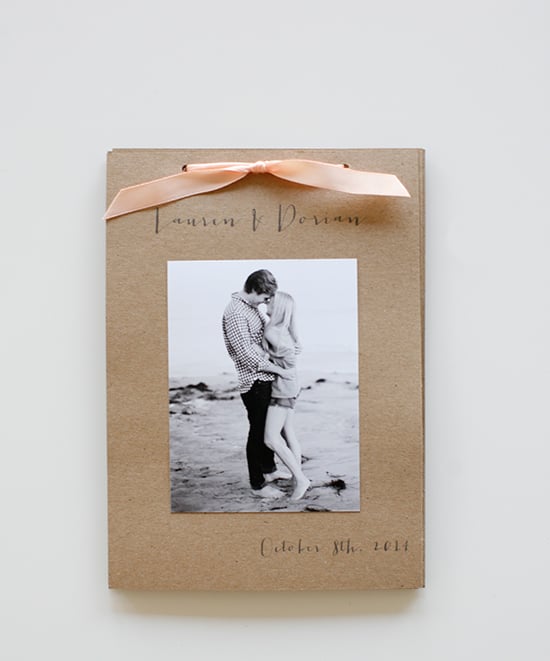
After the party is over, it's nice to put together a small photo album of all the photos you used in the chandelier. Such a great keepsake that you can keep or give to mom or grandparents.
You would need another set of 5x7 card stock, double sided tape, a hole punch and 8” of ribbon. Once you attached all of the photos, you want to punch holes in the card stock so that you can tie the book together with the ribbon. Put the photos in the order you want them to be in and thread the ribbon through the punched holes. Tie the ribbon off so that it creates a photo book. Again a special thanks to Brooke Keegan and Marissa Holmes Photography for providing the super cute engagement photos.