Do It Yourself, or DIY, wedding projects allow you to create your own personalized favors and touches that can be applied in any way you can imagine on your special day, for a shower, a party or whenever. All you need are some basic items and a little creativity.
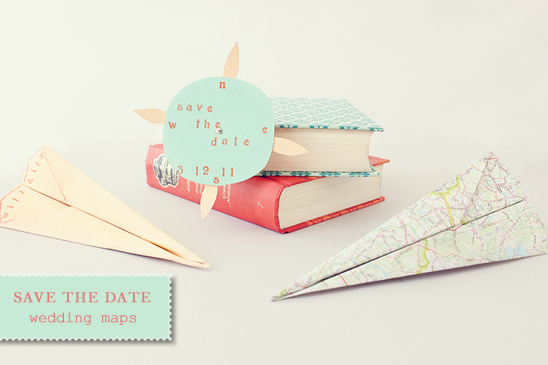
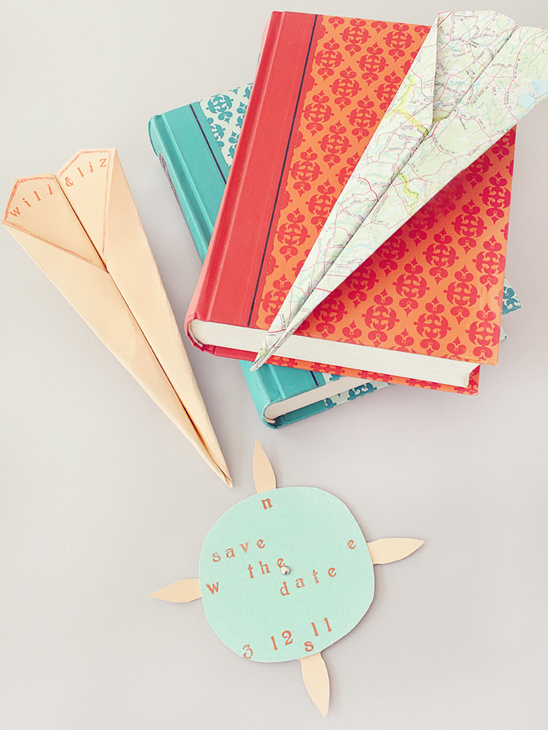
These clever Do It Yourself Save the Date Wedding Maps will definitely get a buzz going about your wedding! Tell wedding guests where and when you’ll be getting married. Plus, the cuteness factor is off the charts. You can see all the photos up close by clicking here! To see more crafty do-it-yourself wedding projects click here.
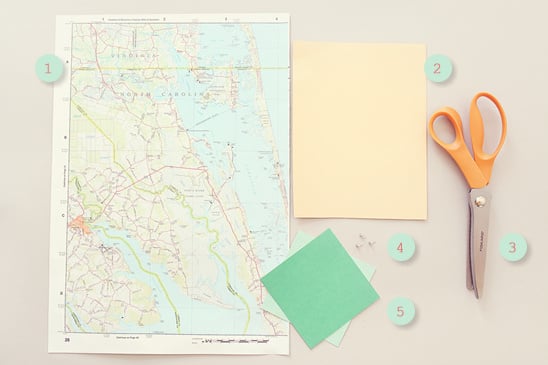
Supplies:
Map of your wedding locale (the specific city or state)
Card stock Scissors Brads
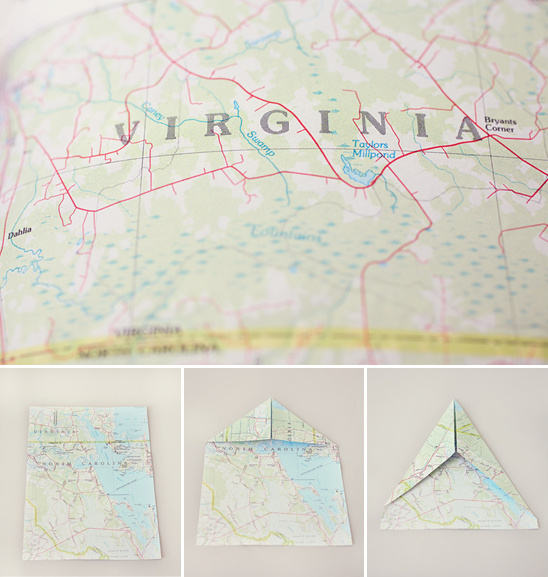
To make the paper airplane:
1. Place an 8 1/2″ x 5 1/2″ piece of paper on a flat surface in front of you.
2. Fold the paper in half lengthwise. Make a crease, then unfold the paper and smooth it flat again.
3. Fold the top two corners down and toward the crease to form two triangles, creating a point at the top of the paper. Press the folds flat.
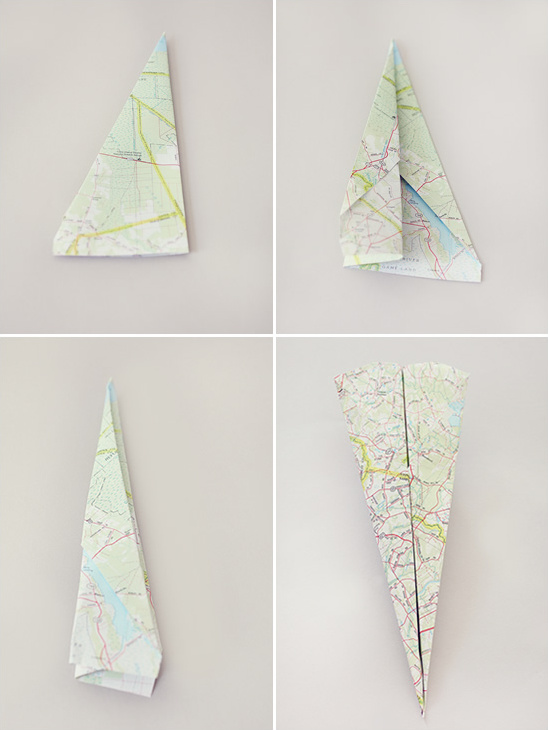
4. Now fold the two slanted edges at the top of the paper in so that they also run along the middle crease.
5. Fold the entire right side of the paper over the left side (along the middle crease), so that all of your new folds are on the inside.
6. Fold down the top folded edge on one side so that it runs along your original middle crease. This will create one of your wings.
7. Flip the paper over and repeat, folding the slanted edge over to meet the middle crease, forming your other wing.
8. Unfold the wings slightly upward, and you’re ready to for takeoff.
To make the compass:
1. Cut out a 3″ x 3″ circle and, using letter stamps, stamp your wedding date onto the card-stock.
2. Stamp “N’, “S”, “E”, & “W” on the four corners of the circle.
3. Cut out a 3″ x 3″ circle, but this time create four points (the points will extend beyond the circle itself).
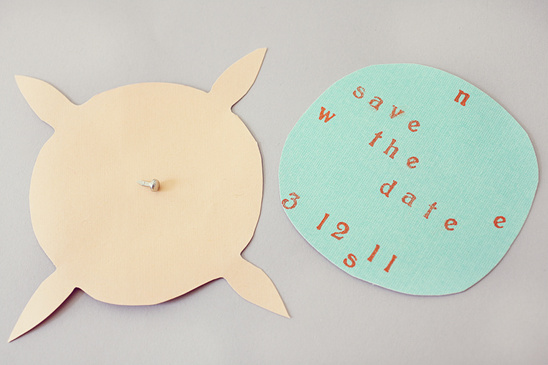
4. Stack the two circles together (the circle with the four points goes on the bottom), and using a craft knife, poke a small hole in the center through both layers.
5. Push the tips of the brad through both circles at the center mark. Fold the tips of the brad outward to secure.
A special thanks to our North Carolina Photographers, Hilton Pittman Photography, for another crafty DIY!
For more of Hilton Pittman’s recently featured do-it-yourself wedding ideas, see below:
DIY Wedding DessertsDIY Pretty Patterned Fabric Envelopes DIY Strawberry Jam FavorsDIY Wedding CakesMake Your Own Hair CombsDIY Easy Candle Wedding FavorsSimple DIY Bridal Clutch