Do It Yourself, or DIY, wedding projects allow you to create your own personalized favors and touches that can be applied in any way you can imagine on your special day, for a shower or party. All you need are some basic items and a little creativity.
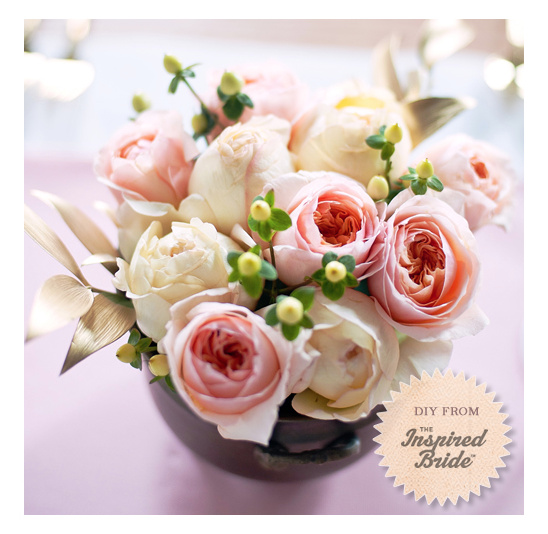
This Garden Rose Do It Yourself Centerpiece can be easily personalized and you can start today. So simple and tasteful.
What You’ll Need:
Vintage Brass Urn (ours is 6″ in diameter) Juliet Garden Roses | Helga Piaget Cream Garden Roses Nagi Filler Leaves Gold Floral Spray Paint Floral Shears Wet Floral Foam Block, Cut to Fit Urn Trim several branches of the Nagi filler just below the third or fourth set of smaller offshoot branches. Lay the Nagi leaves out on a piece of newspaper and spray the leaves according to the directions on the can. Adjust the leaf arrangements if necessary to ensure even coating and complete coverage. Allow the leaves to dry.
In the meantime, insert the floral foam block into the urn – purchase a “wet” block, meaning it can absorb water. Run water over the block so that the block becomes wet and there is a shallow amount of water at the bottom of the urn. The block should not be floating, but there should be enough water at the base that neither the block or container will dry out, especially on hot summer days.
Remove all greenery from the garden roses and trim the stems down so that the bases of flower heads sit above the edge of the urn. Arrange the flowers so that the roses form a circle around the edge of the urn by gently pushing the stem into the wet foam block. “Think twice, push once” – repositioning the flowers causes the hole in the block to become larger, which will make it more difficult to keep each stem in position. I opted to alternate varieties around the outside edge, but a random order is fine, as well. When the circle is complete, fill the center with additional roses to close off open area.
Flip the Nagi leaves over and spray the backs of them, ensuring the coverage is even and no spots are missed. Set aside to dry again. When the paint has set, insert sprayed filler leaves into the arrangement, filling an gaps that may exist between roses. To see the entire shoot From The Inspired Bride, click here.
Photography: Paper Antler Flowers & Supplies Provided By: FiftyFlowers
Something Blue
Discover the prosecco made for life’s most beautiful moments
Meet Gemma →
Engagement Rings
Rings that don't look like everyone else's
Browse Rings→
Guest Books
Fully customizable to match any wedding aesthetic
Shop Now →
St. Lucia
Win a 4-Night Luxury St. Lucia Getaway
Enter Now →
Ad Placeholder Title
Ad Placeholder Subtitle Featured here