Today we’ve got YouTube Cuties Evan and Katelyn and they’re sharing one of their favorite DIYs with you, our favorite people! You’ll have to see their DIY Your A$$ Off TX Wedding then you’ll see why they are DIY sensations.
Take it away guys …
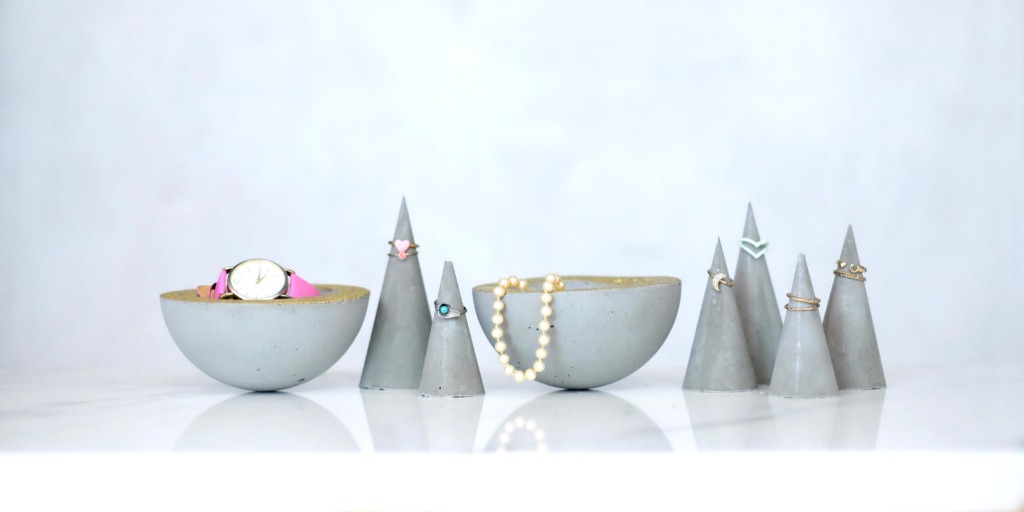
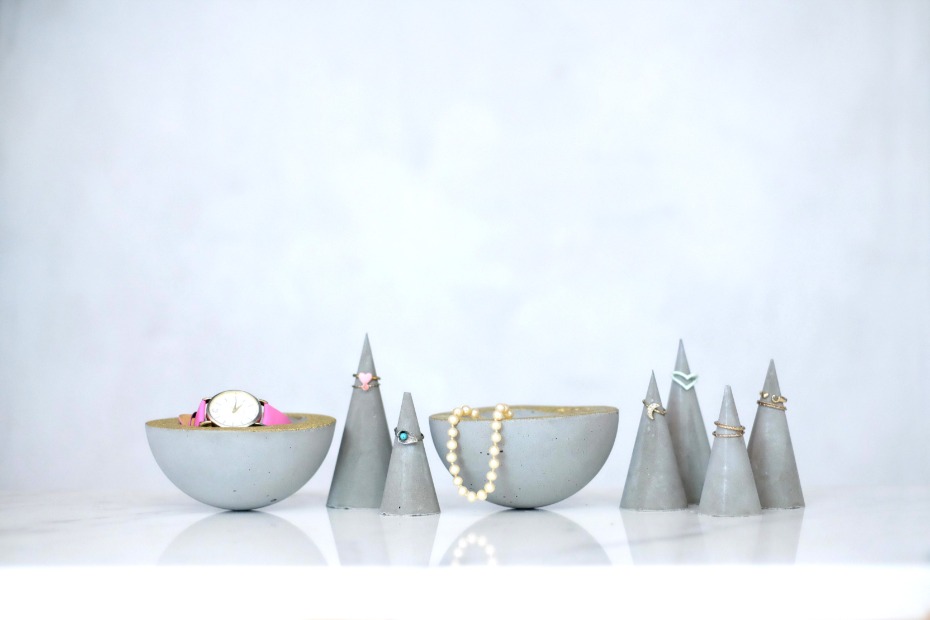
We wanted to make gifts for family, so we decided to try our hand at making some concrete cone-shaped ring holders and small jewelry bowls. This project was really easy and could be customized and adapted in so many different ways – imagine mint or white paint-dipped cones or ombre gold paint!
We made these with simple supplies that we got at the home store and the craft store, and it’s really a project anyone can do even if you’re a beginner. It’s just a matter of finding/making molds, mixing concrete, and waiting! Most of the how-to details are in the video, but here is some additional insight and tips.
We used Quikrete concrete and it’s really easy and cheap. It has directions on the bag for mixing, and we tend to add water until it becomes about the consistency of sandy pancake batter (which I know sounds oh so appetizing). A little water goes a long way, so be careful!
For the bowls, we used clear ornament blanks from the craft store to get our round shape. We used two different sizes: a larger and a smaller. We poured mixed concrete into the large bowl, then pressed the smaller bowl into the concrete. We added a board on top to act as a weight. In hindsight, we should have sprayed cooking spray on the bowls to make them release more easily from the concrete once the concrete was dry. We ended up having to use a heat gun to loosen them, so we could have saved ourselves some headache.
The cones required a little more brainstorming to make the mold, but they were much easier to release. We needed something that would be sturdy enough to hold it’s shape, waterproof, but also flexible enough to be shaped into a cone. We ended up using some leftover transparency paper (((which you can also buy pretty cheap))) and cut the cones out of that. We included templates in our video description links (((below the video on YouTube))) if you’d like to use them to cut out your cone shapes. We taped them into cone shapes, poured in the mixed concrete, and made a little stand for them to dry by cutting holes in cardboard.
Guest Writers and YouTube Cuties Evan and Katelyn, be sure to check out How To Make a DIY Marquee Letter Sign too.