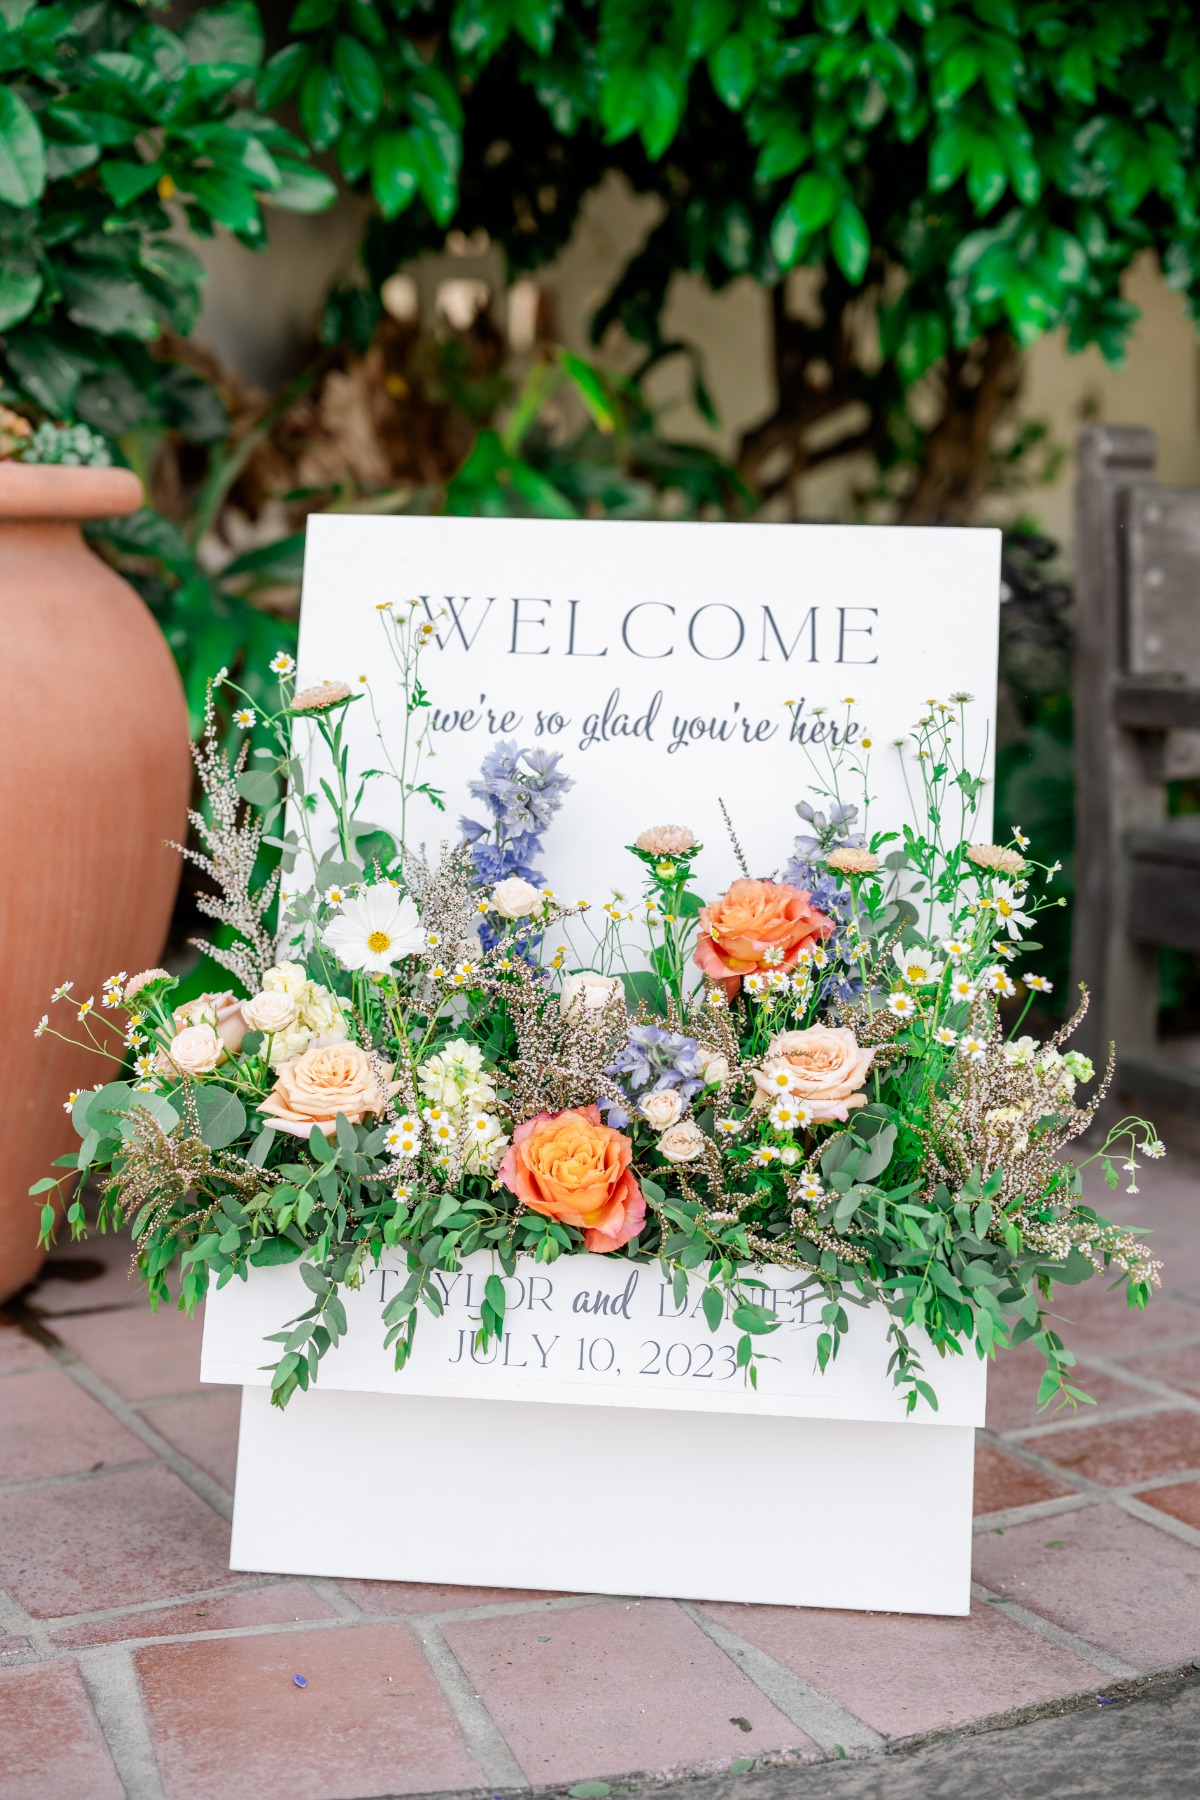
We don’t need to tell you how quickly everything adds up when it comes to your wedding budget for wedding flowers. Every bud, every bauble costs $$$. And yes, take it from us, some things are best left to the professionals like your bouquets or big floral installations, but there are some items on your decor checklist that you can [safely] DIY. With some help from our friends at FiftyFlowers, we decided to try our hand at a welcome sign DIY and we’re obsessed with how it turned out!
Follow us on Instagram for more wedding DIY wedding projects, new wedding dress styles, and the latest in wedding trends.
If you aren’t familiar with FiftyFlowers yet, allow us to introduce you to the online flower supplier that’s changing the way people DIY. Now anyone can access incredible farm-fresh flowers and create unforgettable arrangements without having to break the bank. With FiftyFlowers, you can order flowers and greenery a la carte or do what we did and order one of their super convenient DIY Flower Combos. Believe it or not, we made both of these gorg installations with just one pack!
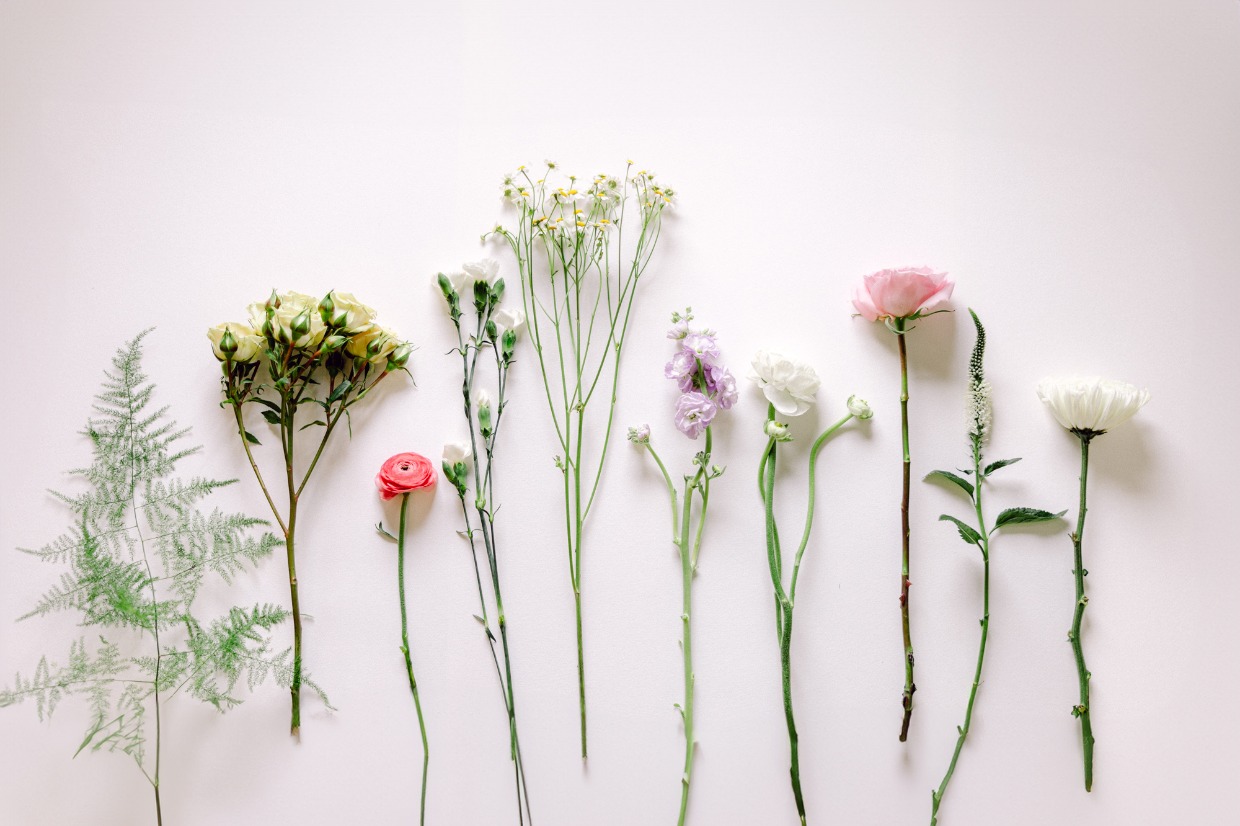
Since 2024/25 weddings are going to be all about color, we decided to go with a fun sherbert-hued color palette for this project. We fell head over heels for the Ethereal Garden Flower Combo Pack–the rainbow of pastels was perfect for our vision and we loved the variety of textures. Plus, it has daises! We also ordered five bunches of extra Plumosa Fern greenery (you can never have too much) and one box of sheet moss to cover the oasis foam blocks that function as the base and hold the flowers in place while keeping them hydrated. We had so much fun creating these looks and we can’t wait to see how you take these projects and make them your own! Who knows, maybe it’s your wedding we’re writing about next…Happy crafting!

DIY Welcome Sign
what you’ll need
- Ethereal Garden Flower Combo Pack, Greenery, Moss, and Oasis foam blocks from FiftyFlowers
- Flower Trimmers
- Florist Foil
- Sande Plywood Sheets 2’x4’ (2 pieces)
- Utility Hinge
- All-purpose wood filler
- Decals – we had this sourced at a local print shop
We took a quick trip to Home Depot to pick up any supplies that we didn’t already have at home and the total was just $60! For this project, you will need to cut the wood. You can do it yourself if you have a saw at home, or the nice people at Home Depot will do it for you for free–all you have to do is ask.
step-by-step guide
- For the back/base of the welcome sign, you’ll need to cut 1ft off of each piece of wood, leaving you with (2) 2’x3’ pieces and (2) 2’x12” pieces.
- Cut one of the 2’x12” pieces of wood in half. This will leave you with (2) 2’x 6” pieces that will be used for the front and bottom of the flower box.
- Cut two 6”x6” pieces from the remaining 2’x12” scraps, these will be the sides of the flower box.
- Use nails to assemble the flower box (or a nail gun because that definitely made our life a lot easier!).
- Use the all-purpose wood filler to fill the nail holes for that flawless look.
- Sand the edges of all of your wood pieces.
- To paint or not to paint- This is a good point to decide if you’re to paint your sign. We tested some paint on some of the scraps of wood to see how it would look and decided we loved the natural look.
- Screw on hinges to bring the front and back boards together. You can hide your hinges or leave them exposed. We opted to put the hinges on top to show off the contrast between the natural wood board and the matte black metal.
- Apply decals to the flower box. Don’t know what to put on there? Well, you’ve come to the right place, here are a few ideas…
Keep it simple :


Or…have a little fun with it:


(But swap in your names!)
Now for the fun part–the flowers!
- Line your flower box with foil. The foil will keep your box dry and your florals moist.
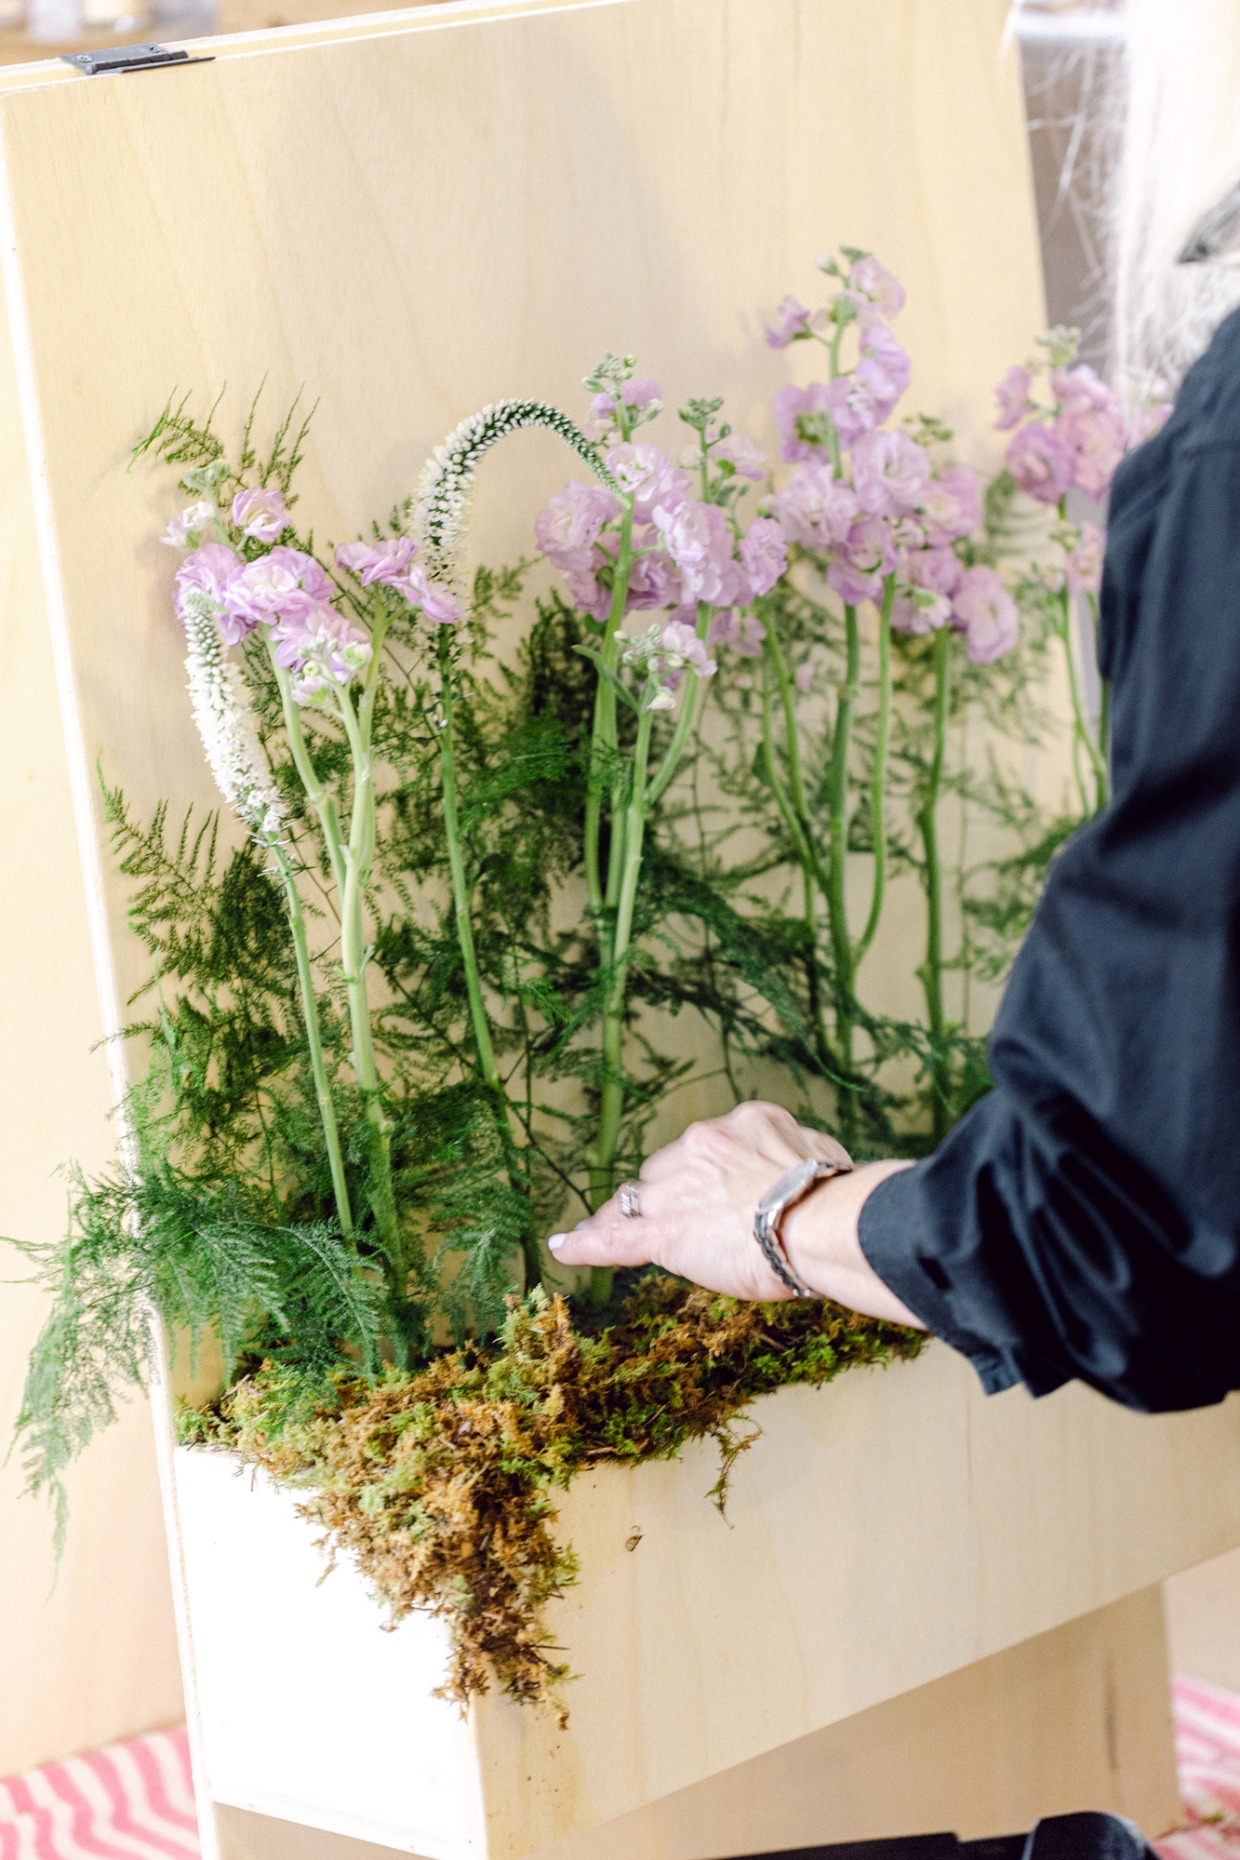
- Cut your Oasis floral foam to fit in your floral box. Cut the foam slightly smaller than the box, as you’re going to soak the foam and it will grow a tiny amount. Soak your foam for about 10 minutes in water. After the foam is wet, you can insert it into your floral box. If you find that there are gaps between the foam and the box, don’t fret, this will all be covered.
- Place moss around all 4 edges of your box, leaving a rectangle of foam visible in the middle. Gently spray your moss with water to keep it happy and fresh.
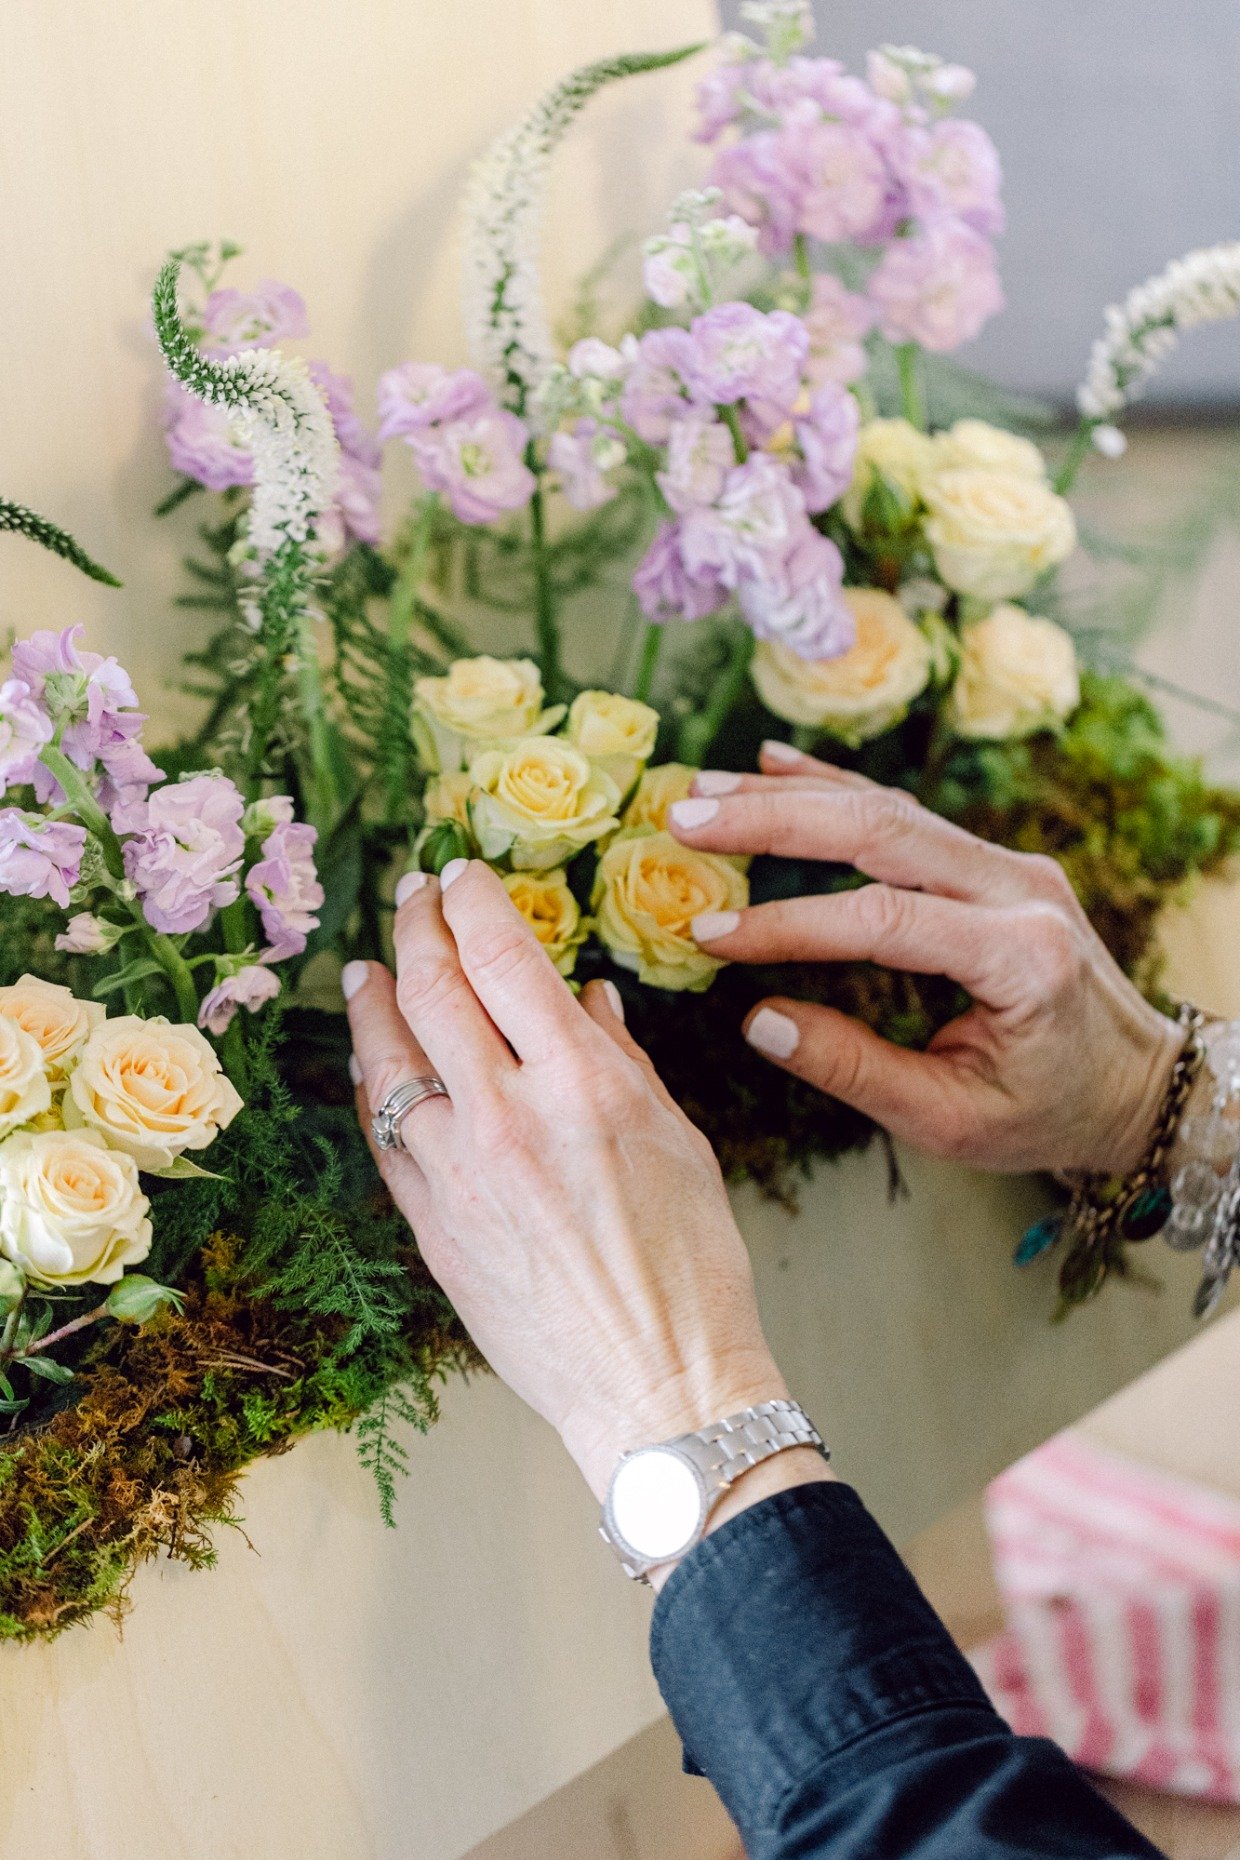
- Place your greenery towards the back of the design.
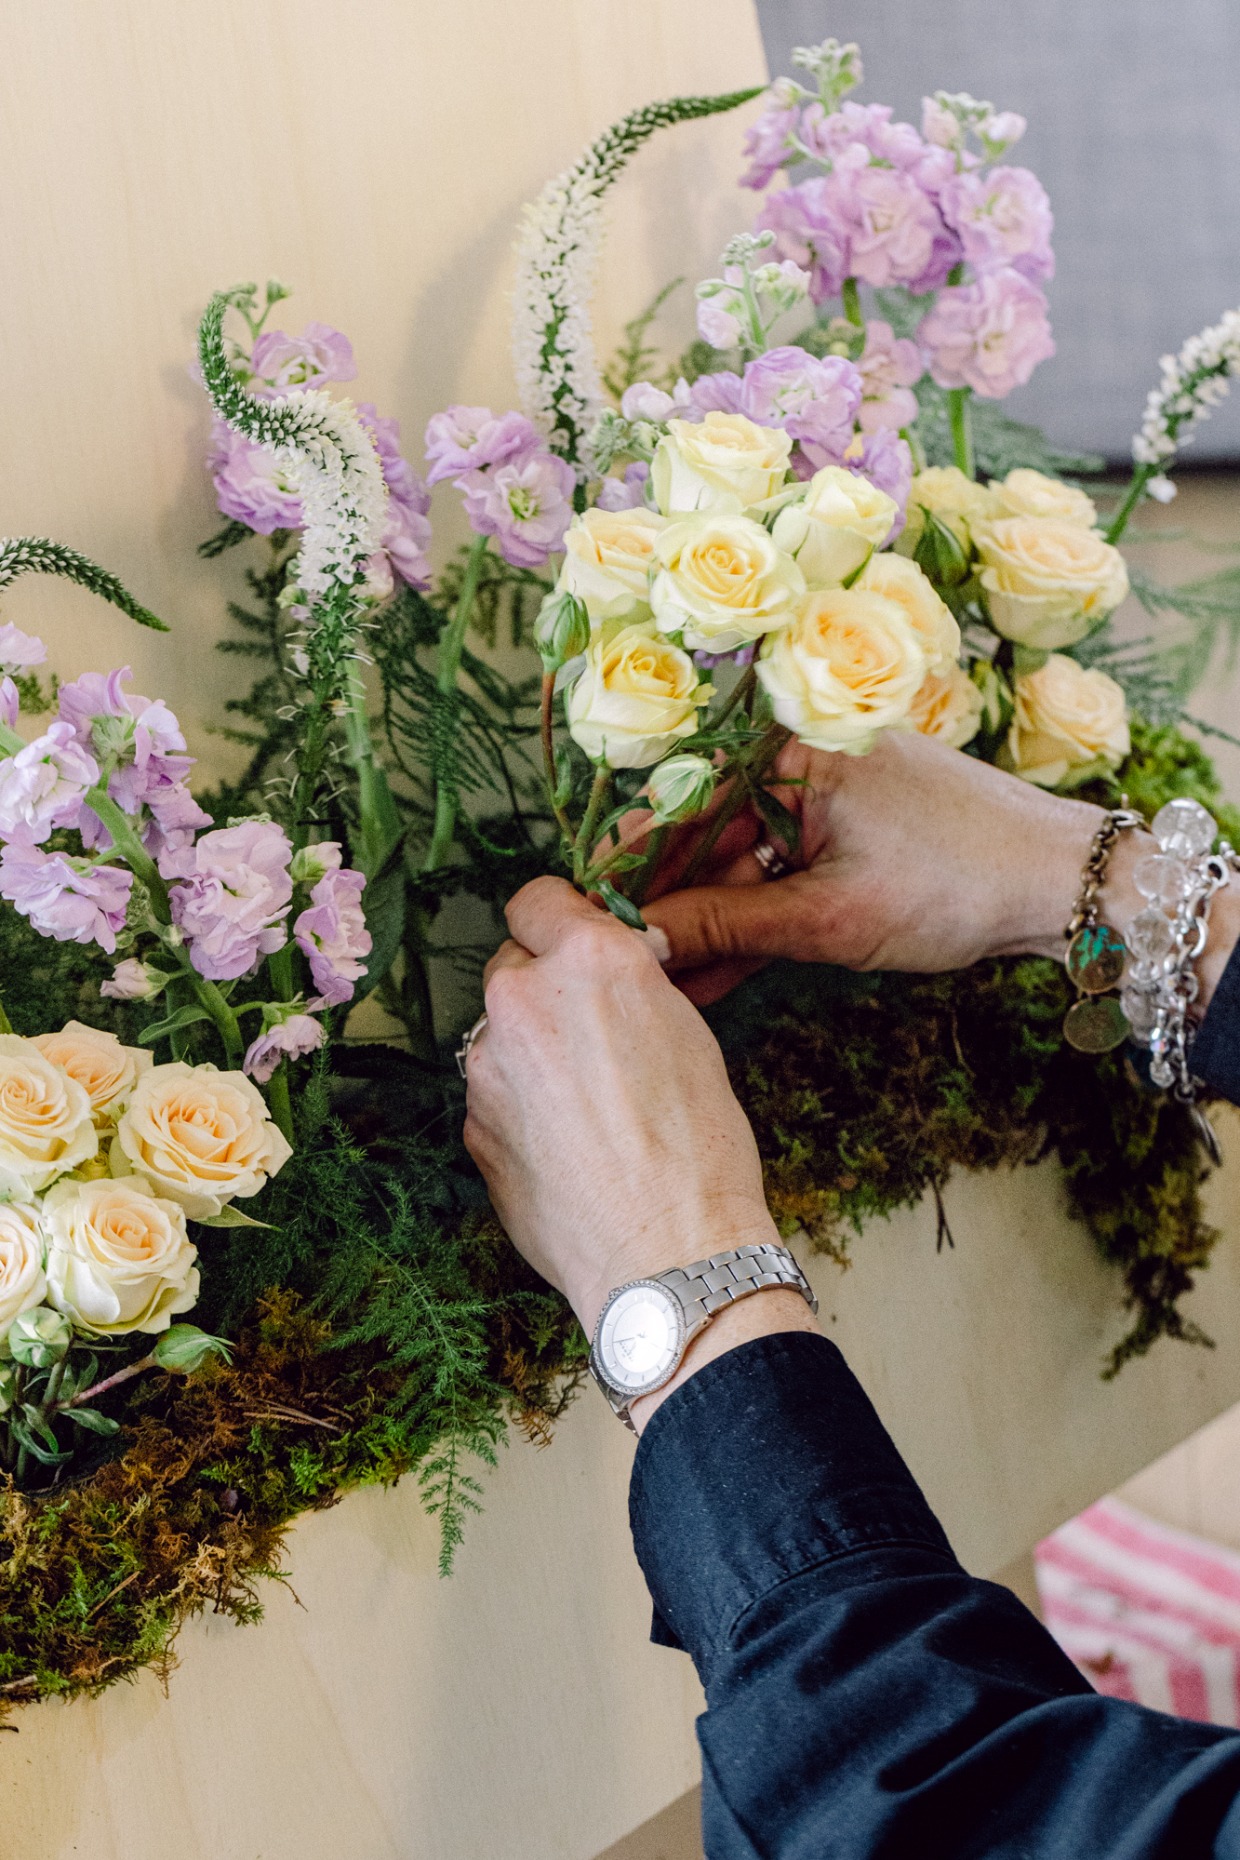
- And finally…Place your flowers distributing them across the foam. This part is fun and somewhat therapeutic. If you have any fun filler flowers (like the daisies) insert these towards the front and sides to give the design a completed look.
- Once you’re happy with how your flowers are arranged, place more moss in any gaps or areas where foam is visible.
- Give your moss another quick little spritz of water and your welcome sign is now complete!
Once completed, your florals should last you a few days, as the foam will keep your flowers nice and moist. If necessary, continue to add a little extra water to your foam each day to ensure your flowers are staying hydrated.
styling ideas for your welcome sign
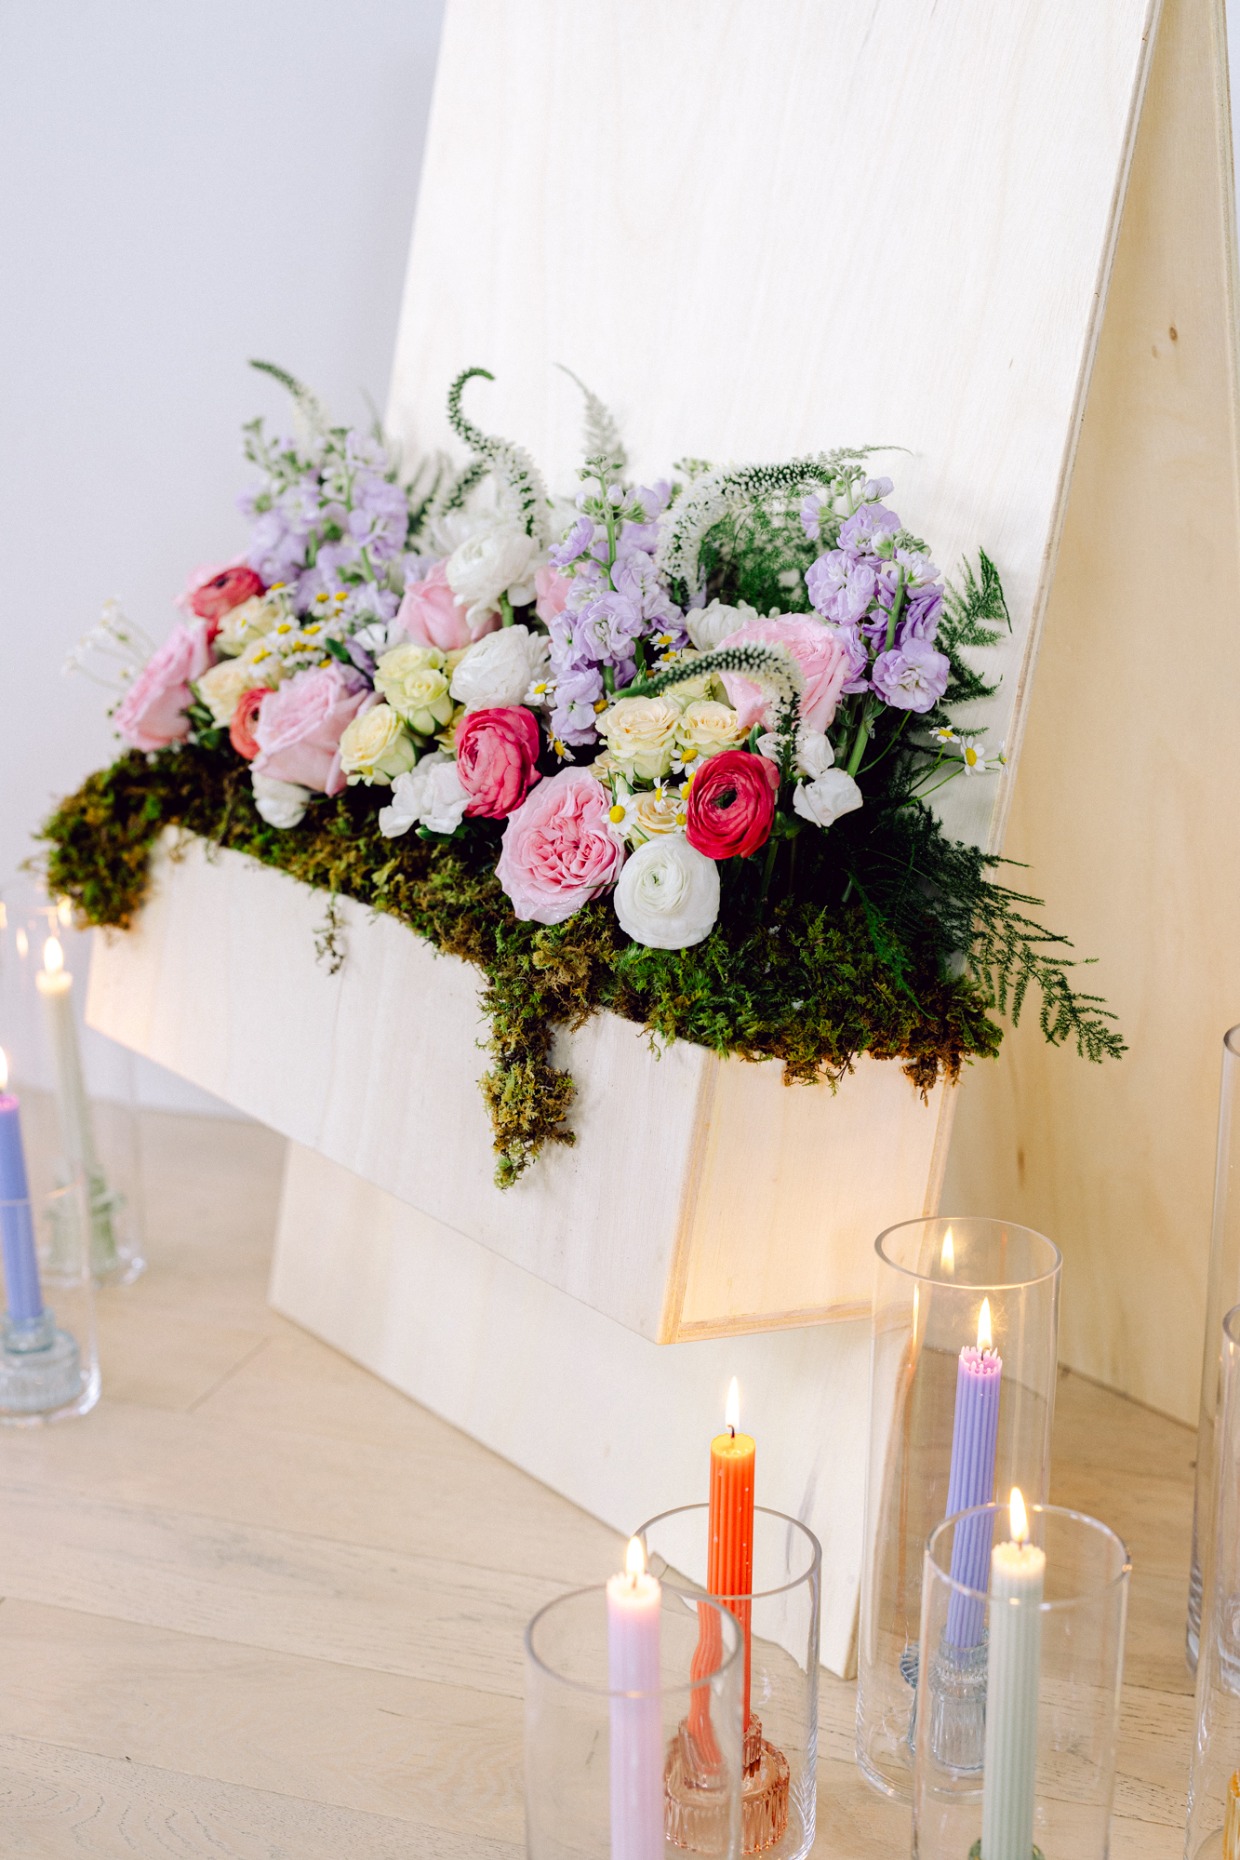
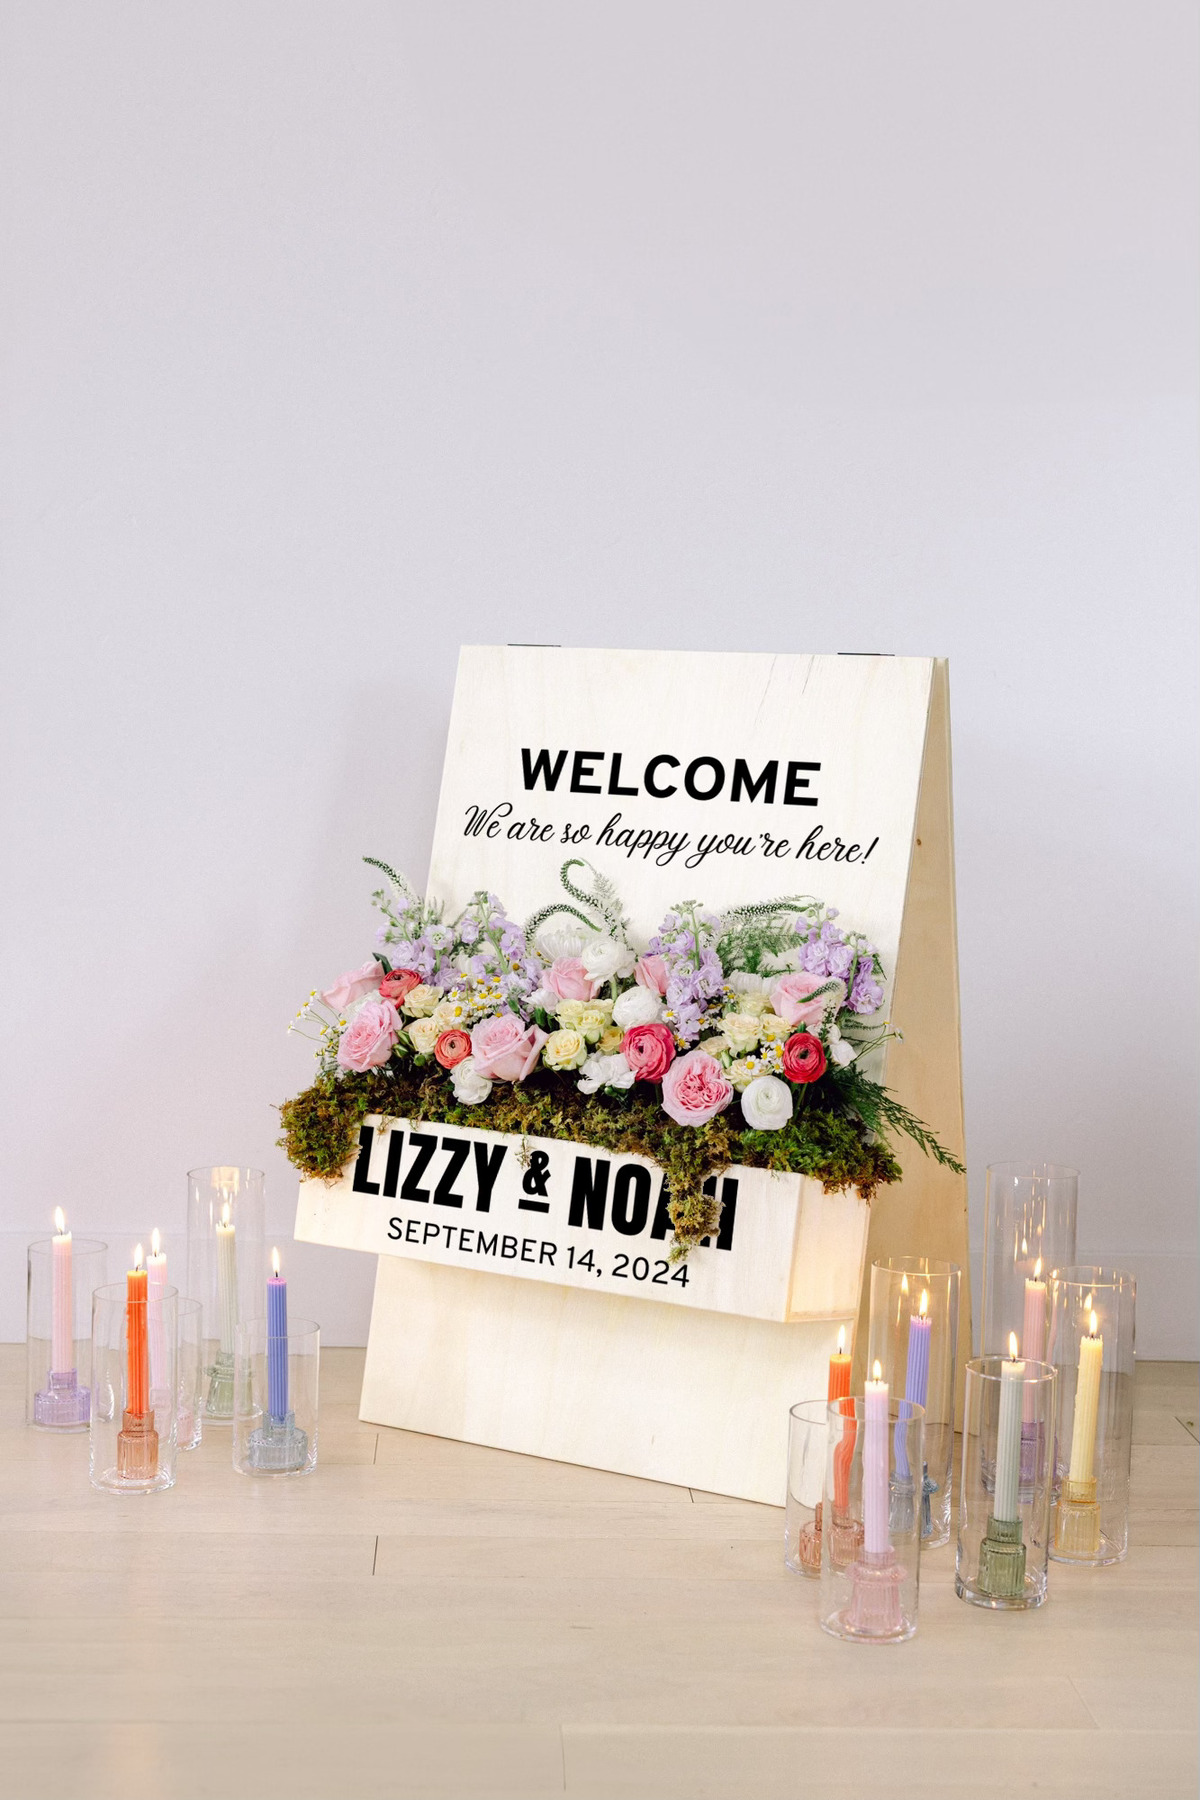
We love the idea of bringing in candles to bring some extra warmth and fill the space around your sign. We paired colorful pillar candles and hurricane vases together and placed them around the sign. Hurricane vases are always a good idea when you have candles in a high-traffic area (let’s not light anyone on fire!) or outdoors–protecting those flames is a must!
Now all that’s left is to try it out. We recommend making the wood base well before your wedding to minimize any stress. And play with your floral arranging abilities in advance too. You could even use your practice display for your engagement party or bridal shower.
Follow FiftyFlowers on Pinterest to see what other couples are DIYing for their big day along with even more DIY ideas and inspiration.
We partnered with Fifty Flowers to bring you this surprisingly easy and affordable welcome sign DIY. As always, thanks for supporting our sponsors!
You might of see this sign on our stories! You should check out the wedding venue, Casa Romantica that it sits in front of. A truly romantic wedding venue!