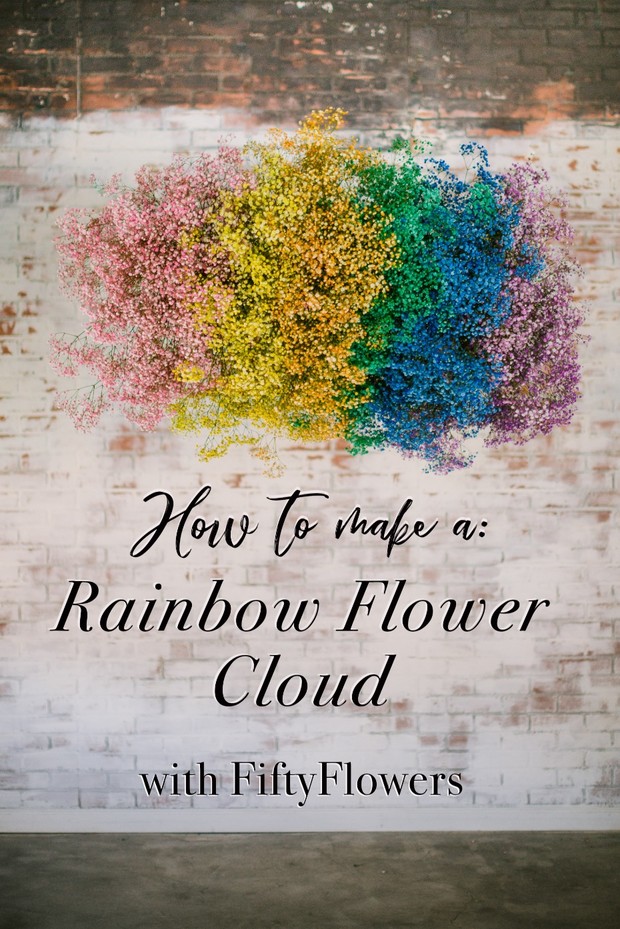
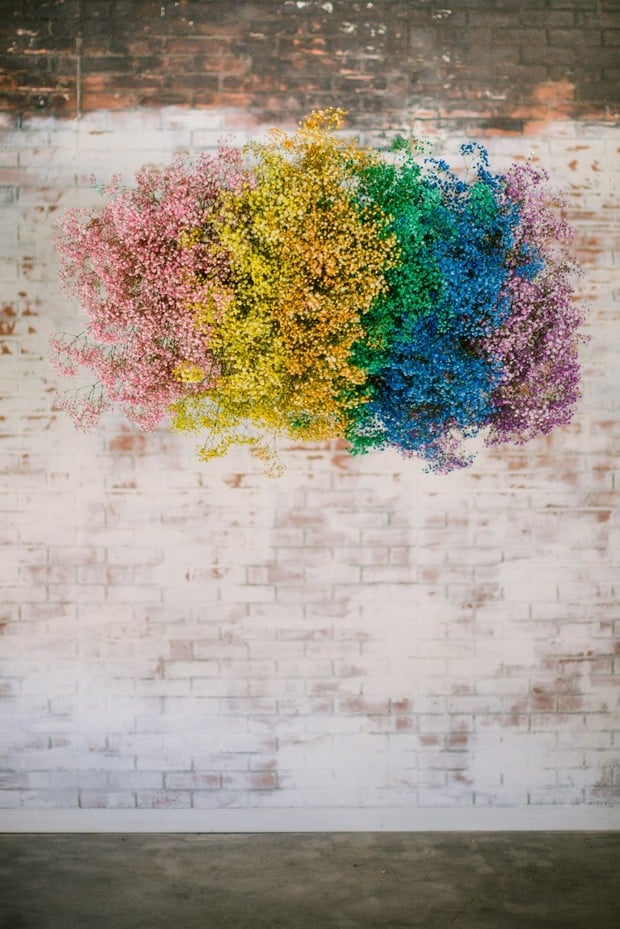
How to Create the Raddest Rainbow Flower Cloud for Your Wedding
We’ve said it before and we’ll say it again, wedding florals are true works of art: they’re living, breathing, focal points that almost end up stealing thunder from the bride herself. Almost, we said almost. In the last few months, we’ve been keeping tabs on a trend that’s been growing by the bunches (quite literally), and yes, florist designers and wedding planners have brought it to our attention, but we’ve been thinking of ways to DIY it (when idealistic images like these are haunting your dreams, that’s what you do, you start drawing up DIY plans). TG for FiftyFlowers.com for giving us the tools, the tips, and all the trendiest materials to make our visions a reality. And, oh, here, this is where we’re going with this… the top wedding floral trend of the year.
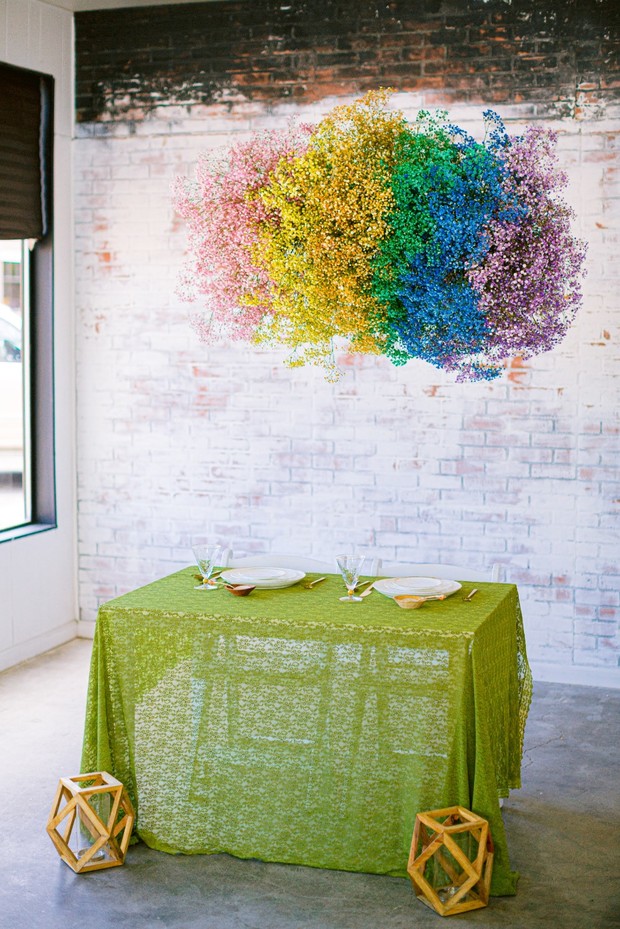
Now, bear with us, we probably haven’t come up with the most eloquent way to describe the trend, but we’ve seen enough caption evidence on Instagram (prefaced by real-life wedding florists) to feel comfortable with our vernacular: flower clouds. These soft, ethereal, blooming beauties are popping up everywhere in weddings - from the ceremony to the reception, and even though they’re usually balanced out by floral tablescapes, garlands, and more grounded centerpieces, they just have a way of drawing guest gazing upwards, towards the sky. Can’t say we hate it, either…
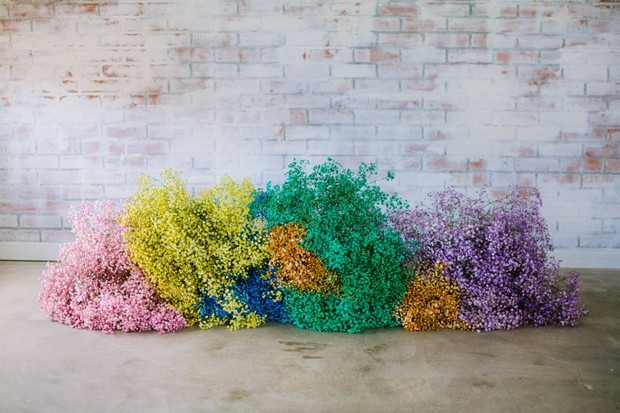
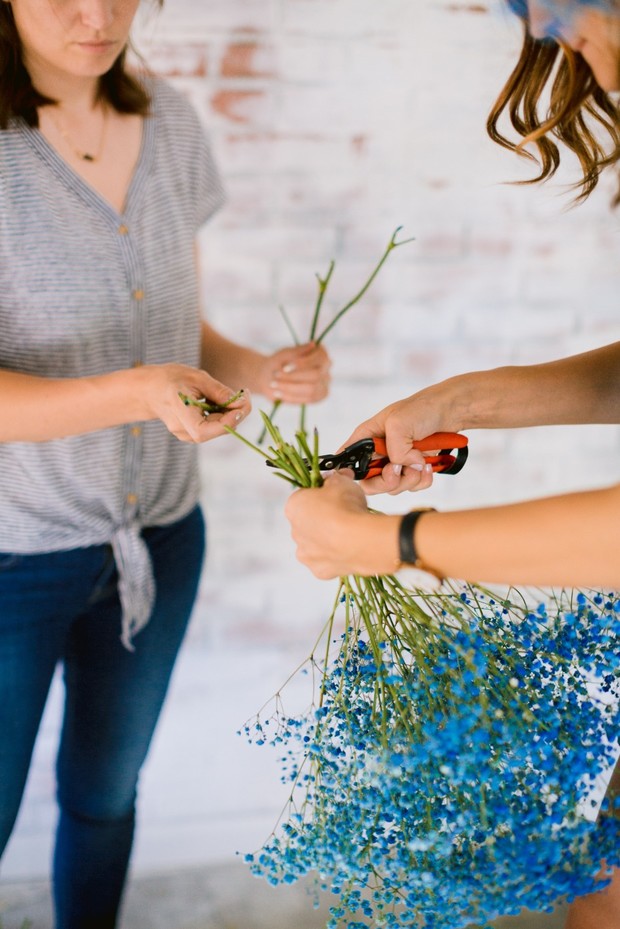
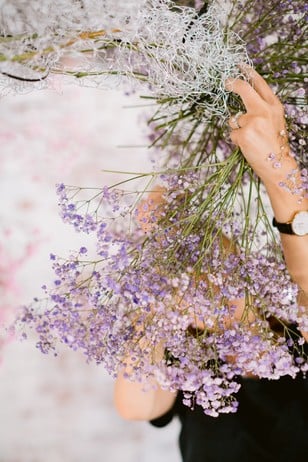
We’ve seen it done with gorgeous, open flowers like roses, dahlias, anemones, and magnolias; we’ve double tapped a ton of likewise whimsical and boho looks with hanging, trailing flowers like orchids, wisteria, and all kinds of soft, whispy greenery; but for this project, we were really excited to show off the fluffy, cloud-like design - and baby’s breath pulls off that delicacy 👌👌👌. It’s white, so you know, the cloud thought isn’t too much of a stretch, but did you know that these classic filler flowers are offered in white, tinted, and glitter varieties? Hello 🌈 dreams, we’re here for you.
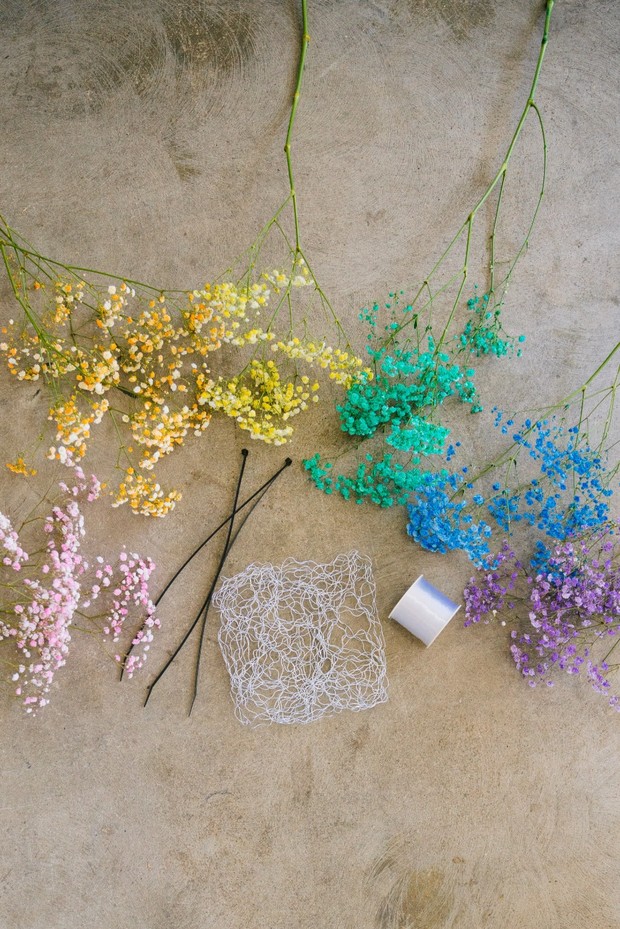
What we used.
And, again, we did a rainbow motif, but you can tailor your colors to match your wedding palette (rose gold is an actual option, not even kidding)
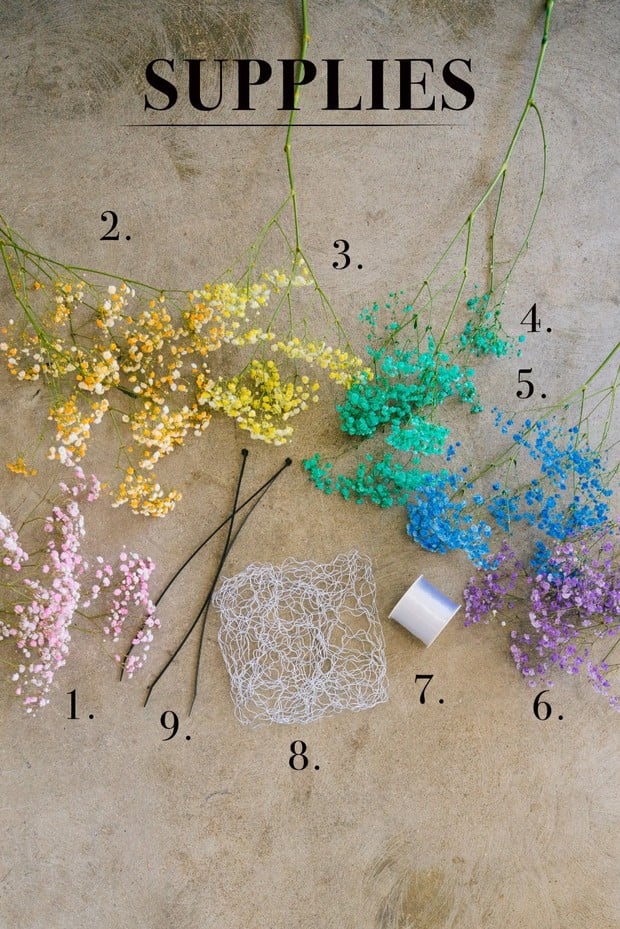
- Light Pink Baby's Breath
- Orange Baby's Breath
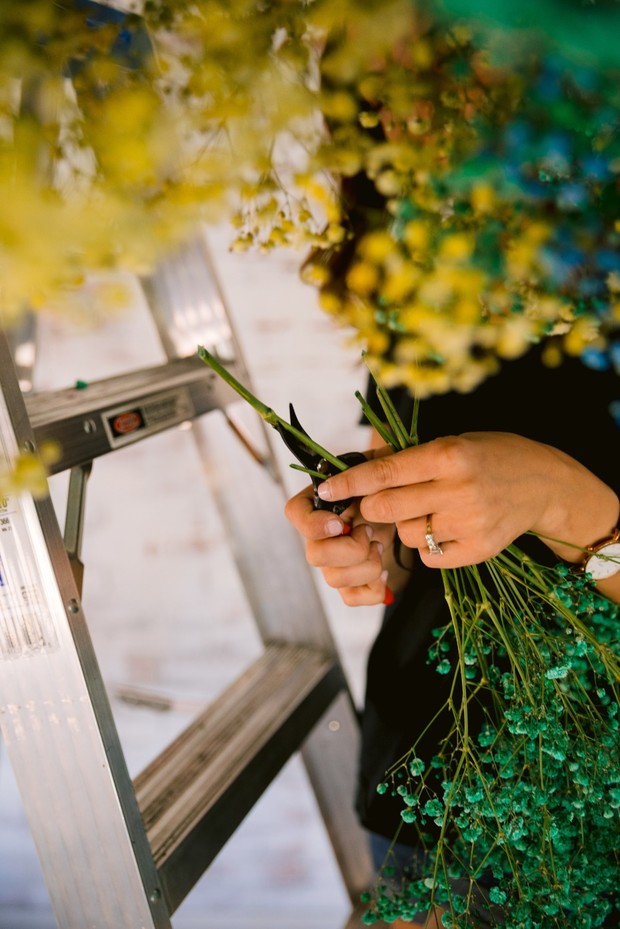
- Yellow Baby's Breath
- Seafoam Green Baby's Breath
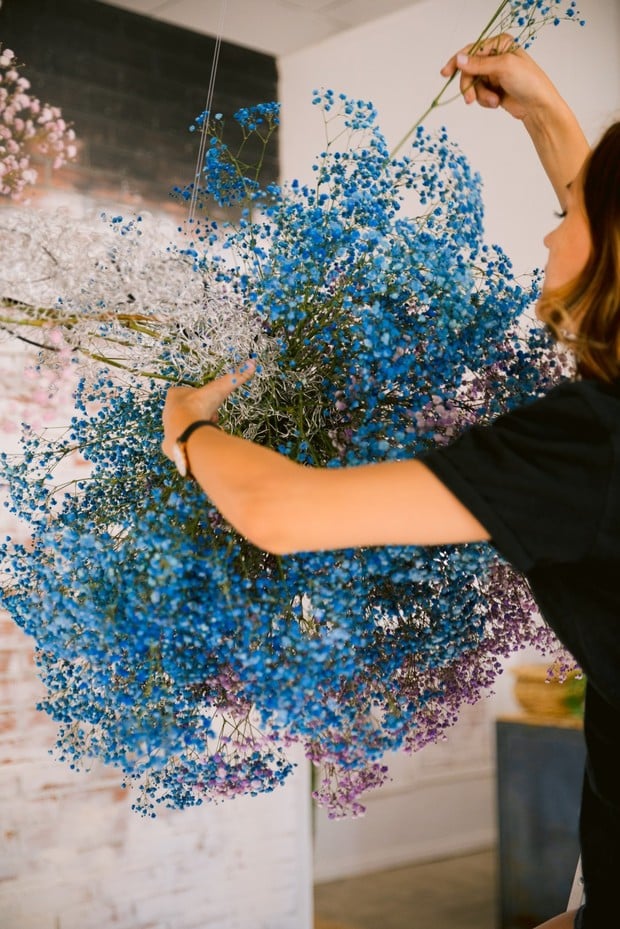
- Blue Baby's Breath
- Lavender Baby's Breath
- Wire Armature (qty. 7)
- Fishing Line (**can be sourced, cheaply, from any outdoor store or Amazon)
Telling you RN, as intricate as this looks, it’s not too hard.
5 simple steps…
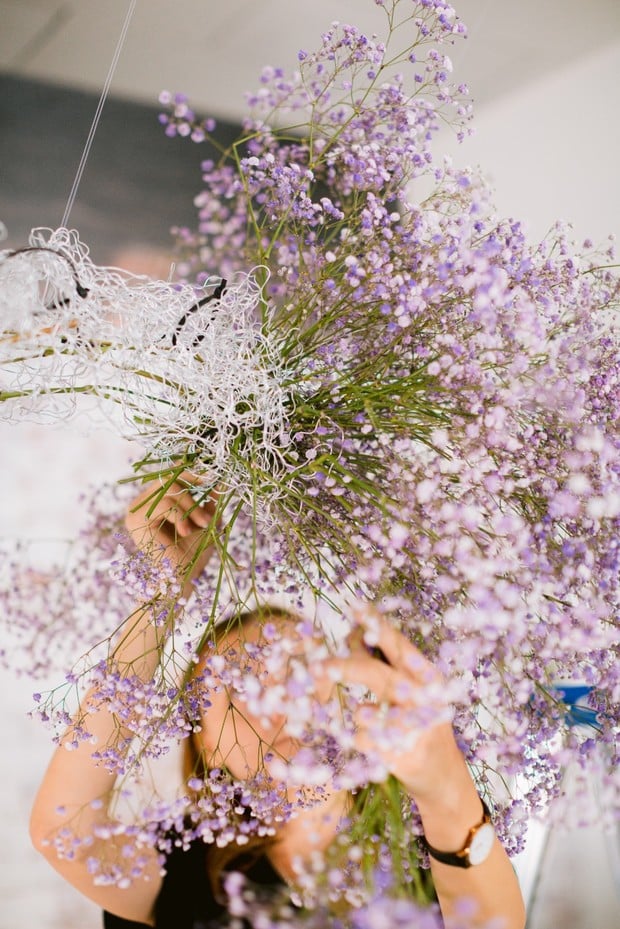
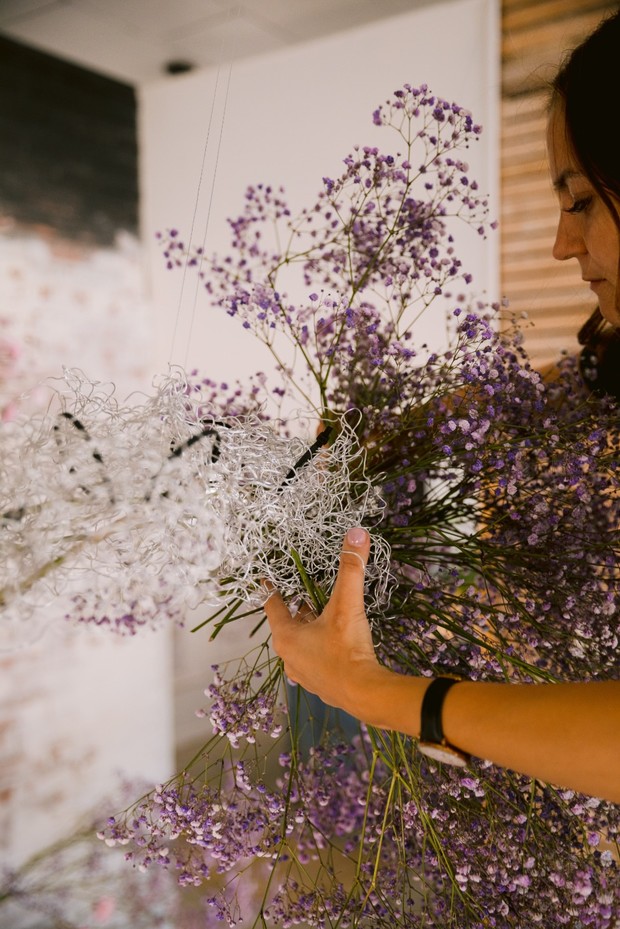
Zip tie your wire armatures together to make the base for the flower cloud. *No idea what an “armature” is? Yeah, we weren’t really familiar with it either, but essentially it’s just metallic wiring (FiftyFlowers.com has copper, gold, and silver varieties - we used the silver) that provides a sense of formatting for your flower installation. Super artistic and a lot of fun to work with!
Grab your fishing line and anchor it from your ceiling (we used utility hooks and suspended from a beam above our design space).

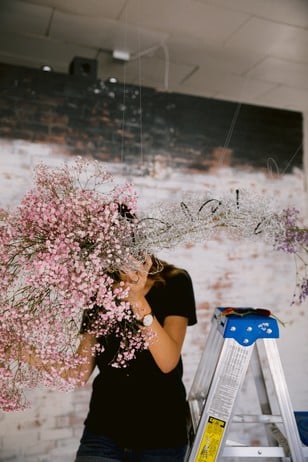
Tie the fishing line to both ends of your wire base.
Begin inserting your baby’s breath into the wire armatures on either end, alternating to evenly add stems on each side and keep the overall installation balanced.
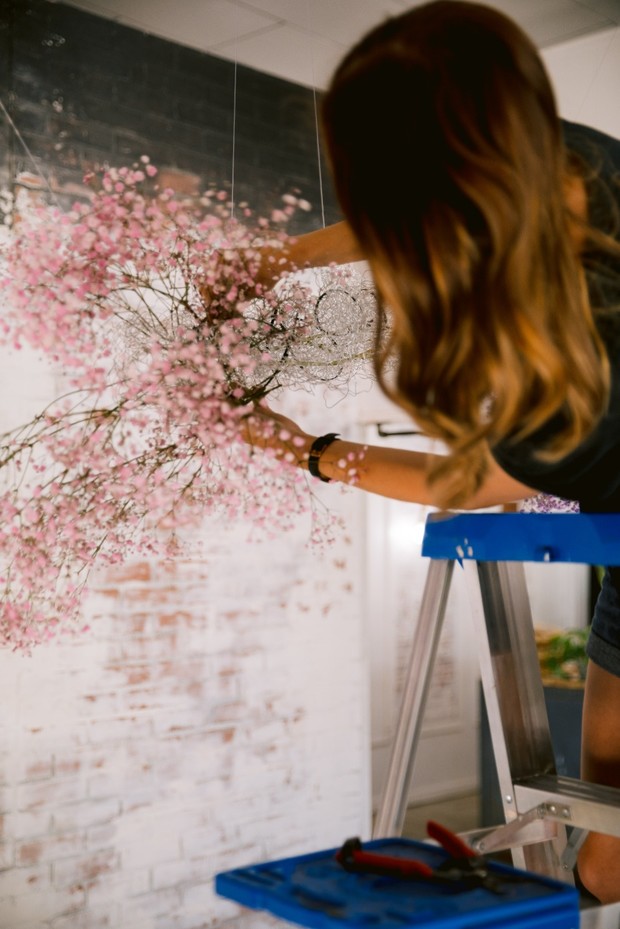
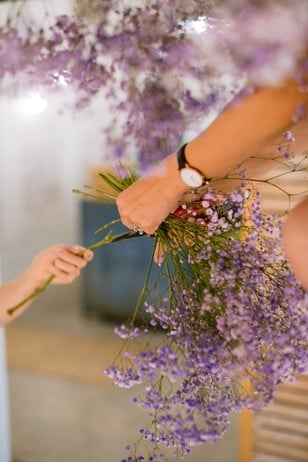


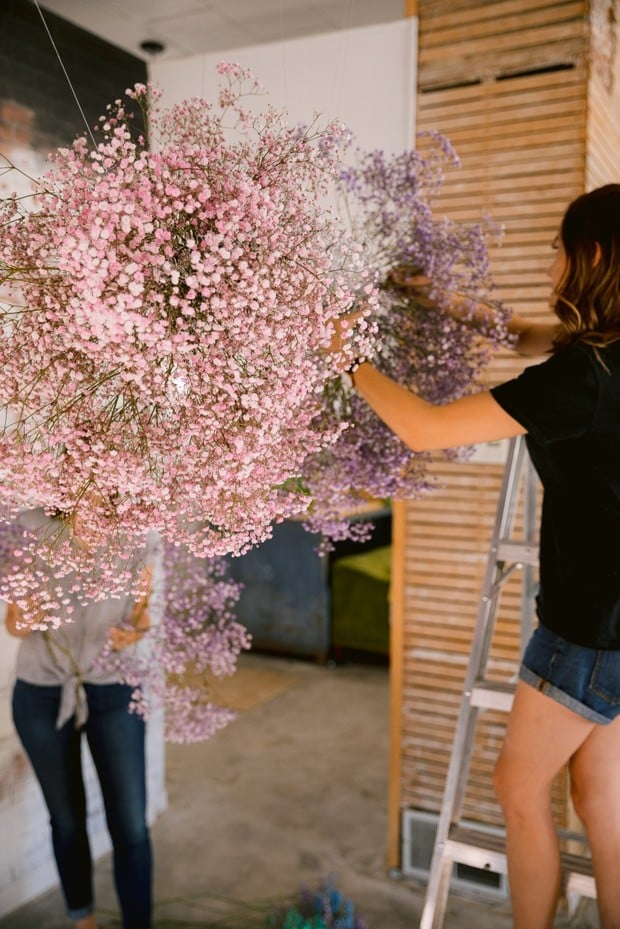
Work your way into the middle until you’ve filled in the entire base.


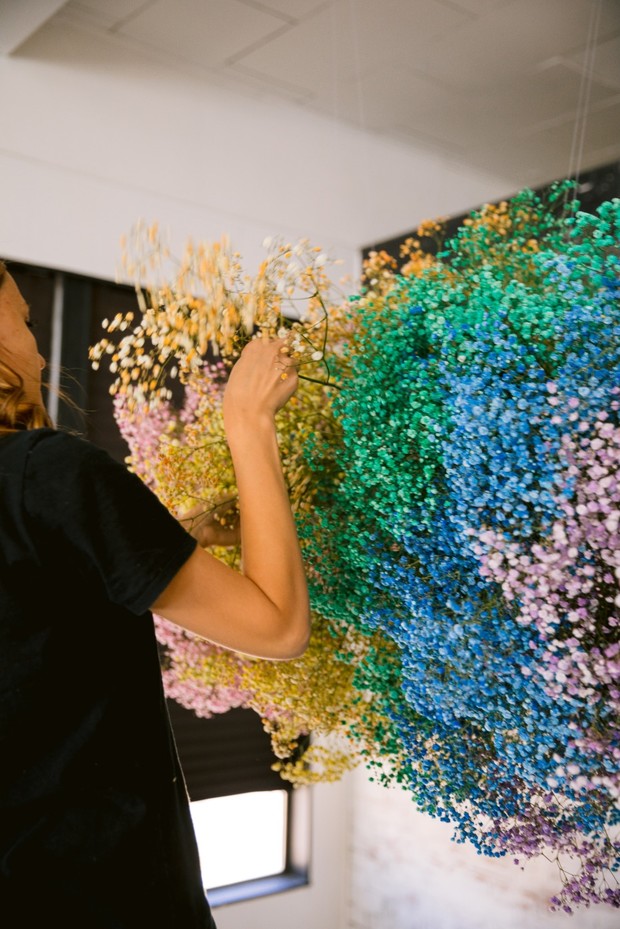
More of a visual learner? We got you…
While we used it to pretty up a sweetheart table, we could totally see it working for:
A heavenly altar install (just imagine the photos of you and your partner exchanging vows, rings, and that iconic first kiss, all below a flower cloud of love. Insane)
Long, farm table reception suspension (seriously ROYGBIV the hell out of the space above your guests)
The dessert table (rainbow wishes and pâtisserie dreams)
The kids area (not to make rainbows seem amateur, in any way, but if you’ll be having a kids table/craft area/activity set up for your tiny attendees, it could be helpful to use a rainbow cloud or two to define where they’re supposed to go)
Oh, and who’s to say that these flower clouds only have to happen at the wedding? All the pre-wedding events, from the engagement party to the bridal shower, bachelorette to the rehearsal dinner, can get instant lift from these lovely elevated flower arrangements.
Just suspend your disbelief, will ya? 😉
Get to know FiftyFlowers.com for all your DIY-ing!
FOLLOW FIFTY FLOWERS ON IG, TOO, IF YOU AREN’T ALREADY! YOU’LL GET A LOT OF IDEAS
- Flowers: Jewels Floral
- Wedding Photographers: Radion Photography & Cinema
- Styling & Design: Wedding Chicks