
Do It Yourself, or DIY, wedding projects allow you to create your own personalized favors and touches that can be applied in any way you can imagine on your special day, for a shower or party. All you need are some basic items and a little creativity.
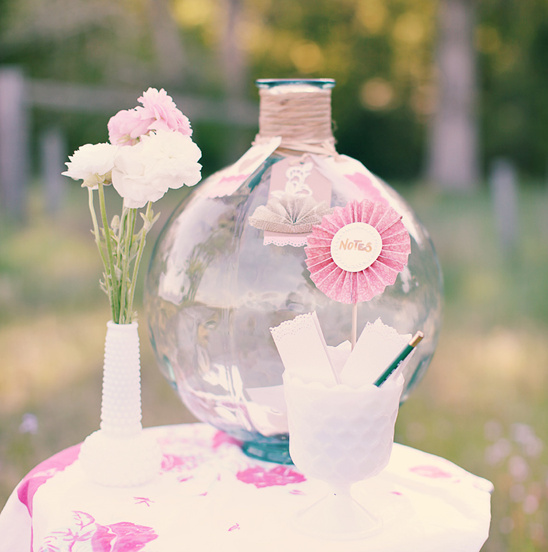
This Do It Yourself Wedding Guest Book involves creating and hanging tags that can be strung from a vase or jar holding messages and well-wishes for the bride and groom. It can be used as your guest book and can also be easily personalized. So simple and sweet. Be sure to see all of our wedding diy projects.
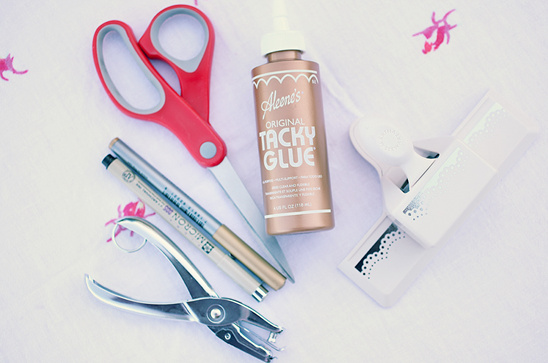
Supplies:Scissors Craft glue Metallic marker Nice felt tip pen Lace-edge craft punch Card-stock (Cream, Pink, Coral, Gold)
Button Feathers Lace applique Wooden skewer Rhinestones Hole punch Paper Raffia Large jar or vase Smaller jar or vase Step 1:
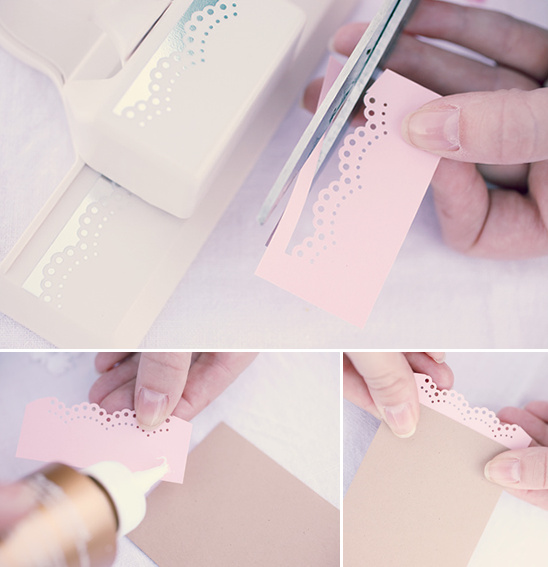
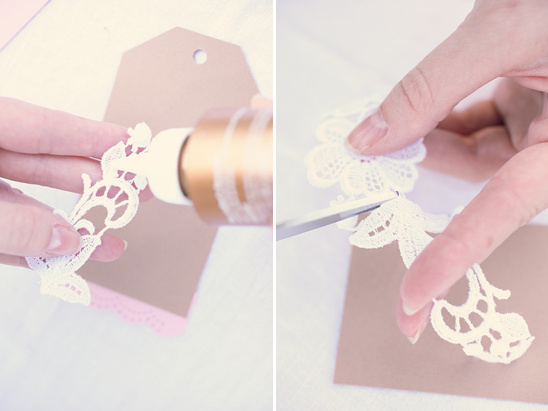
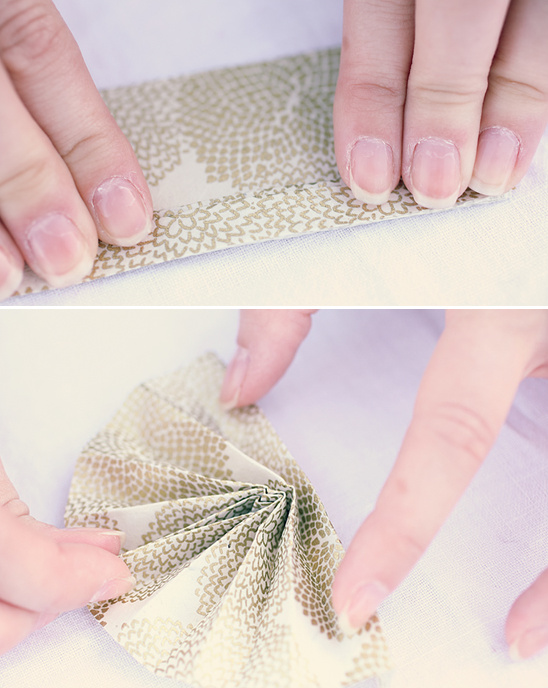
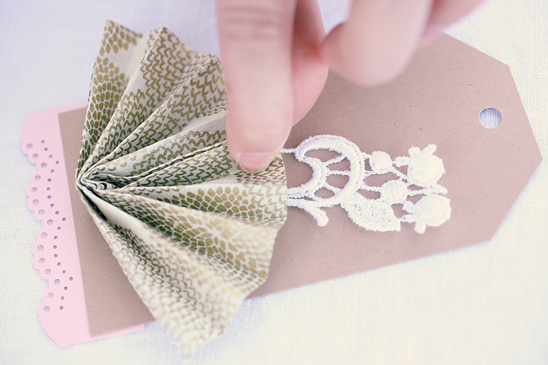
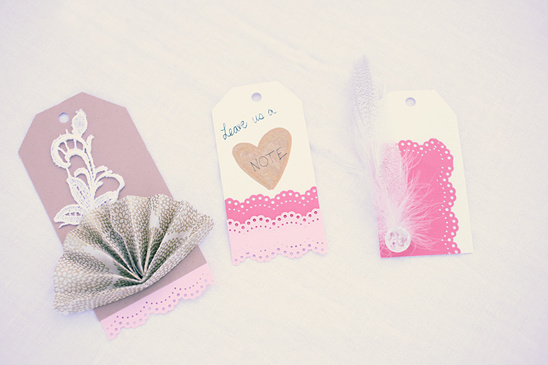
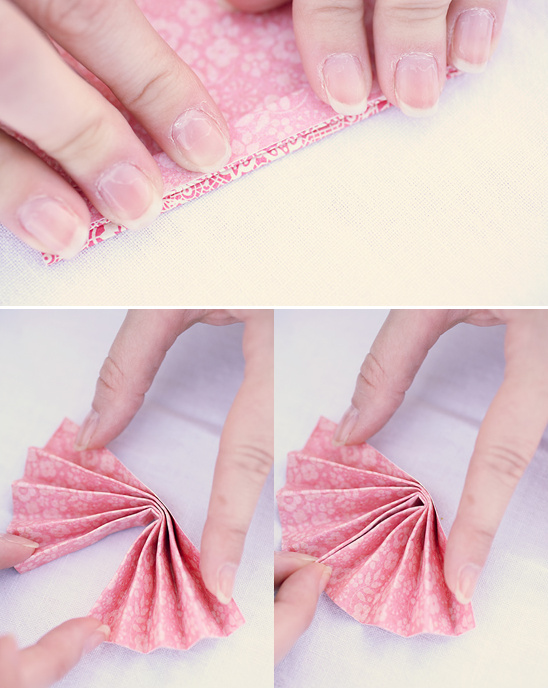
To make the kraft paper hanging tag, first cut your kraft card stock to roughly 2×5 inches to resemble a hanging tag. Cut a piece of the pink card stock to the same width as the hanging tag and about 2 inches tall. Trim one of the long edges with the lace punch and glue to the back of the tag, near the bottom, so the lace design hangs below the edge. Trim a piece of your applique to get the desired portion and glue to the tag close. Cut a square of the gold patterned paper and fold like an accordion. Next, fold the accordion in half, holding the inner edges and gluing along that seam. When the glue is dry, gently pull the open accordion so it fans out. Glue this to the tag.
Step 2:
To make the feathered hanging tag, first cut your cream card stock to roughly 1.5×3 inches to resemble a hanging tag. Cut a rectangle of the coral card stock the width of the tag and about 2.5 inches tall. Cut one short and the neighboring long side with the lace punch. Glue this piece to the tag, flush with the bottom and the left side. Next, choose two feathers and glue near the bottom left corner of the coral piece. On top of the feather bottoms, glue a button.
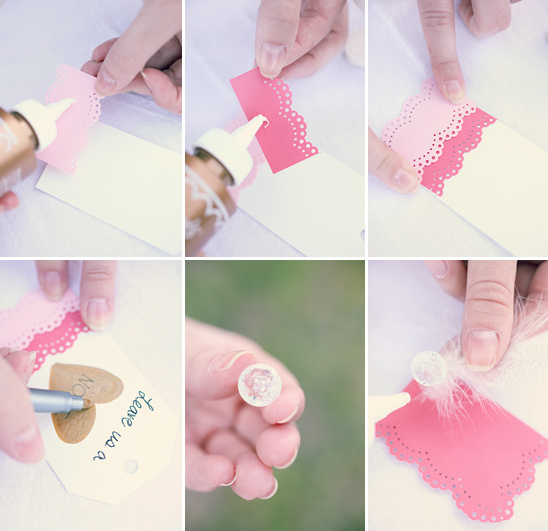
Step 3:
To make the tag with the instructions, first cut your cream card stock to roughly 1.5×3 inches to resemble a hanging tag. Like before, cut a piece of the pink and coral card stock the same width as the tag and about 1.5 inches tall. Next, cut both of the long edges with the lace punch. Glue the coral piece about a half inch from the bottom of the tag. Glue the pink piece so it overlaps about half of the coral piece. With your metallic marker, draw a heart in the center of the blank space on the tag. Next, write “Leave us a” in the space above the heart and then write “Note” inside the heart.
Step 4:
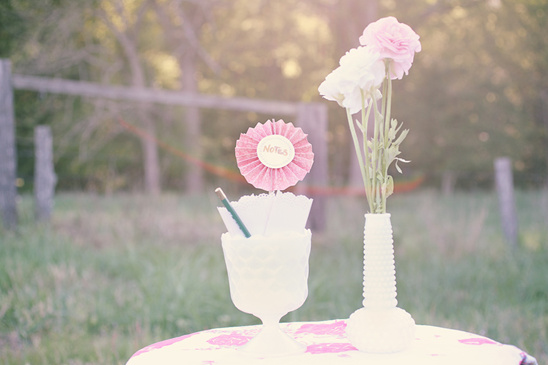
Using raffia, string the three hanging tags and tie around the lip of the large jar or vase for your guests to drop wedding love notes in.
Step 5:
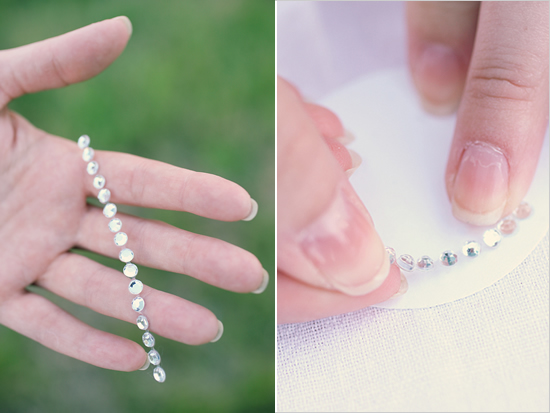
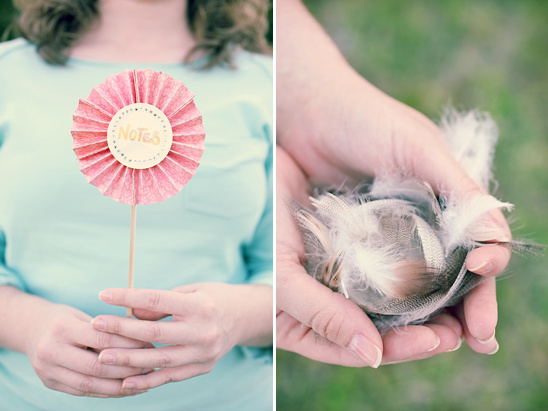
To make the Notes pinwheel, first cut three squares of the pink patterned paper in 4×4 squares. Like before, fold each accordion style, fold the stack in the middle, and fan outward. Glue together each of the four joining edges. Cut a circle of cream card stock about two inches in diameter. Take rhinestones and stick them around the edges of the circle. In the middle of the circle, using your metallic marker, write “Notes.”
Step 6:
To make the slips of paper for your guests to write the love notes on, cut strips of cream card stock roughly 2×6 inches. Cut one of the short edges with the lace punch. Place these strips, along with the pinwheel, in the smaller jar or vase with a pen or pencil for your guests.
Thank you to Hilton Pittman Photography for this adorable wedding do-it-yourself project.