Do It Yourself Wine Bottle Menus
Do It Yourself, or DIY, wedding projects allow you to create your own personalized favors and touches that can be applied in any way you can imagine on your special day, for a shower or party. All you need are some basic items and a little creativity.
These Do It Yourself Wine Bottle Menus are incredibly easy and oh-so-clever. They can also be easily personalized. So simple. Be sure to see all of our wedding diy projects.
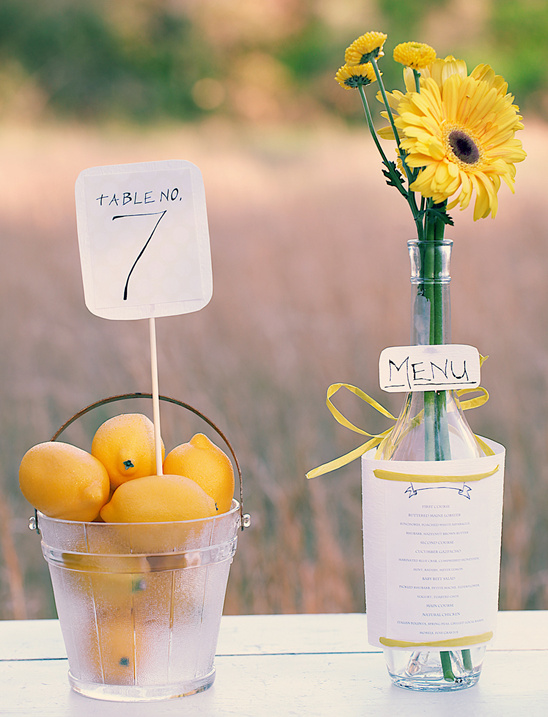
Gather together some empty wine bottles and put them to work as menu card displays at your wedding! Fill each wine bottle with flowers to double as a pretty centerpiece.
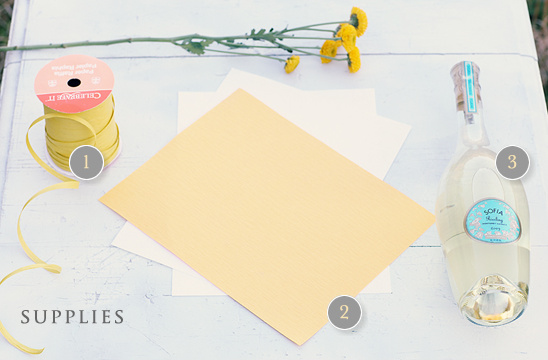
Supplies:
1. Paper Raffia Ribbon
2. Card-stock
3. Wine Bottle
4. Scissors
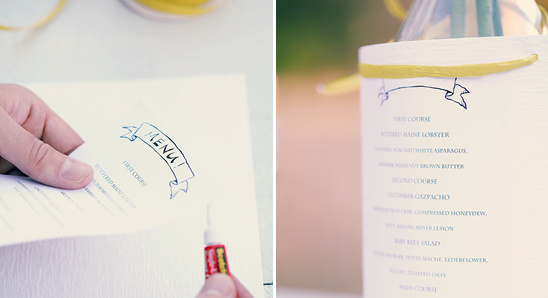
Glue the printing paper onto your choice of colored card-stock. Poke small holes on either top end of card-stock and string paper raffia ribbon through, tying into a bow.
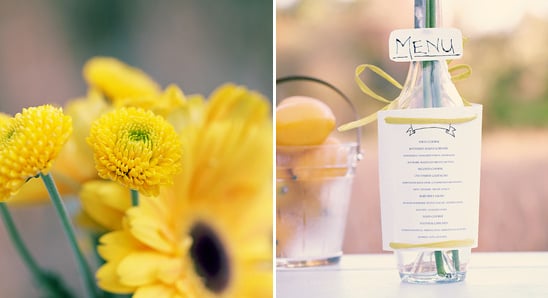
Next, poke small holes on both bottom end of card-stock. Hang the menu card onto the wine bottle, and tie loose ends of raffia to ensure it is wrapped around securely. Fill wine bottle with fresh flowers for a pretty centerpiece.
Thank you to Hilton Pittman Photography for this adorable wedding do-it-yourself project.
Download the menu cards HERE.
This download is laid out 8.5x11 inches and is meant to be cut in half to create a 2 - 8.5x5.5 menus per page.
If you do not have photo editing software, print out the download as-is.
Next, compose your text in a word processing program leaving a little room at the top so you don't print over the Menu Banner graphic.
Put the paper back through the printer and print out your text.