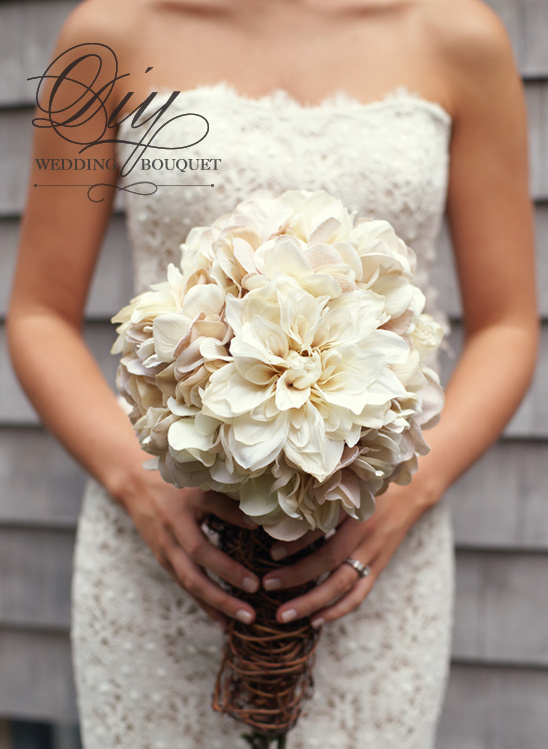
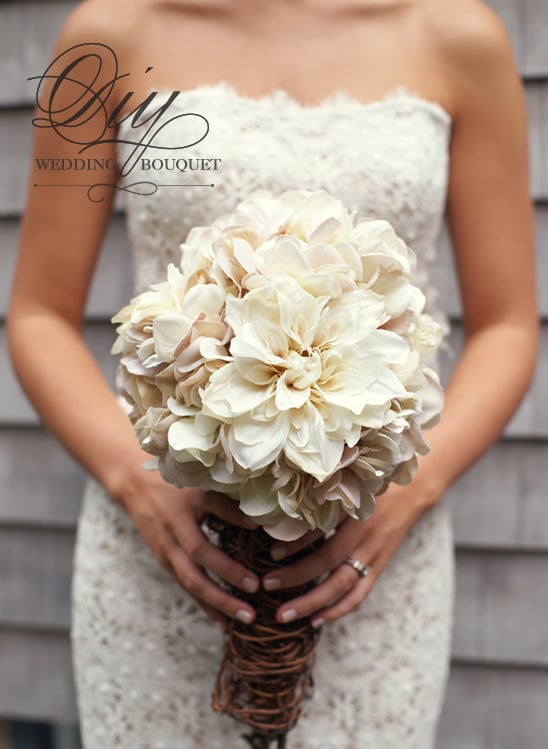
Remember Macie’s Diy Hydrangea And Mum Bouquet? It was the most pinned bouquet we have ever featured and our readers wanted to know more about it! Well…you will be happy to know that Jaimee Morse, the photographer, worked together with the bride to get instructions so that you can create it yourself. All you need are a few simple supplies. Be sure to read on to learn how to create this rustic wedding bouquet.
Materials
7 Hydrangea flowers
3 Mums (Macie used a larger flower but my craft store didn’t have any)
1 package of Brown Floral Wire 1 package of Natural Wire (twig/jute looking wire)
1 spool of Brown Sheer Ribbon A few push pins or glue gun Wire Cutters

A special thanks to Jaimee Morse for recreating Macie’s wedding bouquet. To see the entire wedding click here and read on for step by step instructions on how to create your own Hydrangea And Mum Bouquet.
1. First, cut off all the leaves from the fake flowers. Take three of the hydrangeas and put them in a triangle like shape. Take three more of the hydrangeas and place them around the other three. Now take the last hydrangea and place it in the middle-top of the bouquet.Let it stand a little taller than the other flowers so that it has more of rounded look.
2. Take the three Mums and place them around the bouquet.
3. When looking at the bouquet from the top, the three Mums will look like they’re in a disconnected triangle.
4. Take some of your brown floral wire and wrap it around the top and the bottom to secure the flowers together.
5. Now you’re going to cut the ends of the stems. There isn’t a certain length that the stems must be at but you should be able to comfortably put both hands on the stem part.
6. By starting at the top, take your ribbon and start wrapping it around the stems. You can secure the ribbon at the top by either using a push pin and tacking it into the stems or using a hot glue gun. It’s ok if the pin can be seen because it will be covered by the floral wire.
7. Wrap the ribbon almost all the way down the stem, leave about a half an inch of the stems showing. You can do a couple layers if you want to add more of a thickness. Secure the ribbon again with a push pin or hot glue gun.
8. Take the natural wire and start loosely wrapping it around the stem.
9. Use the whole spool of natural wire to wrap the stem. You can even use two spools if you want more thickness.
10. Now take the brown wire and wrap it a few times around the stem so that it secures the natural wire.